Item View
This section explains how to display data from the database.
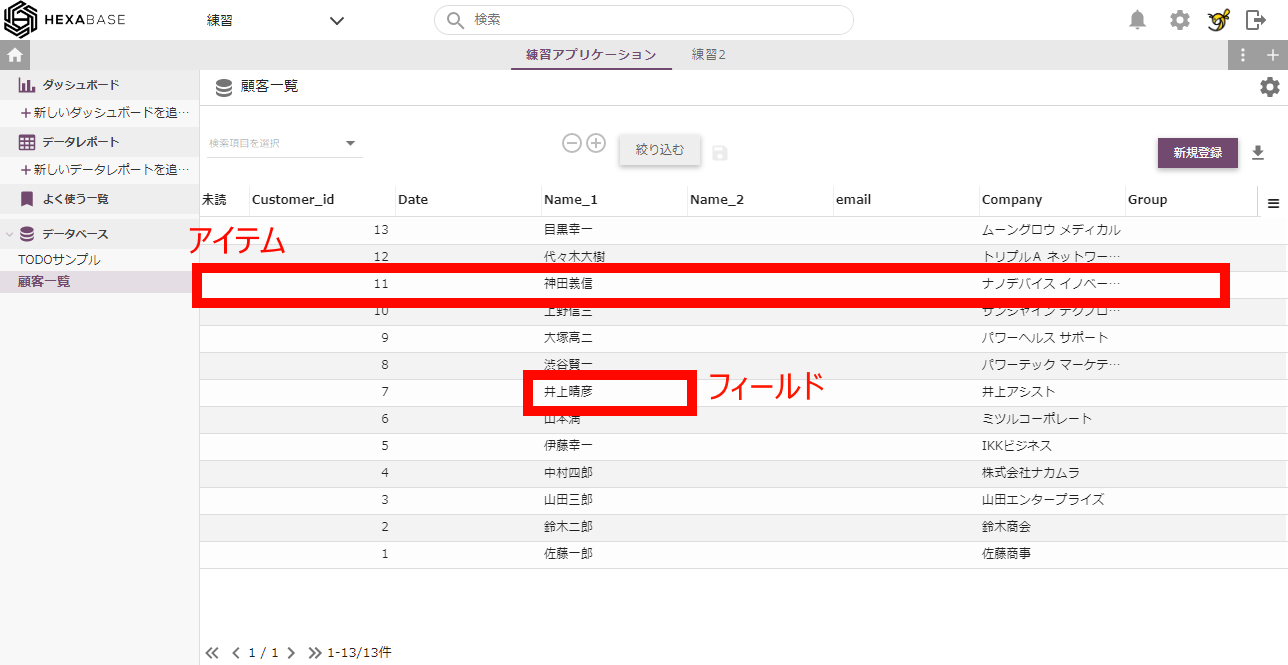
In Hexabase, each piece of data in the database is called an "item". One horizontal row of the table is an item. Corresponds to a general RDB record.
Also, the "item" column is called "field" or "項目".
Menus that operate "items" are called "actions."
Data list
Hexabase can maintain data using database views.
For that purpose, Hexabase has three views: "table view", "board view", and "grid view".
You can switch between these three views with the buttons below the application bar.
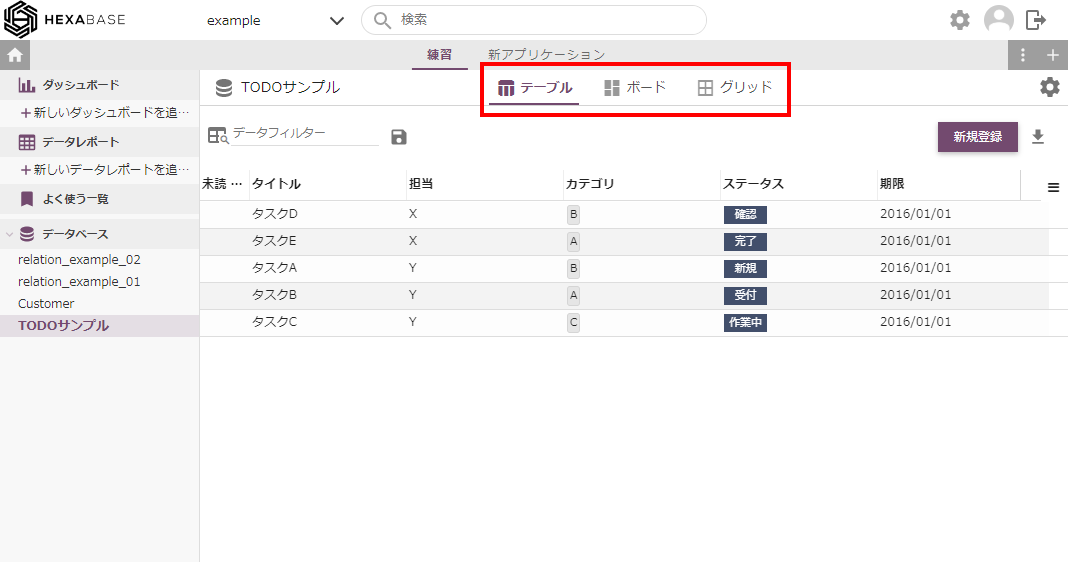
※ To use "Board view" and "Grid view", it is necessary to enable the corresponding view in the database'sbasic settings.
Table view
A table view is a normal data list panel.
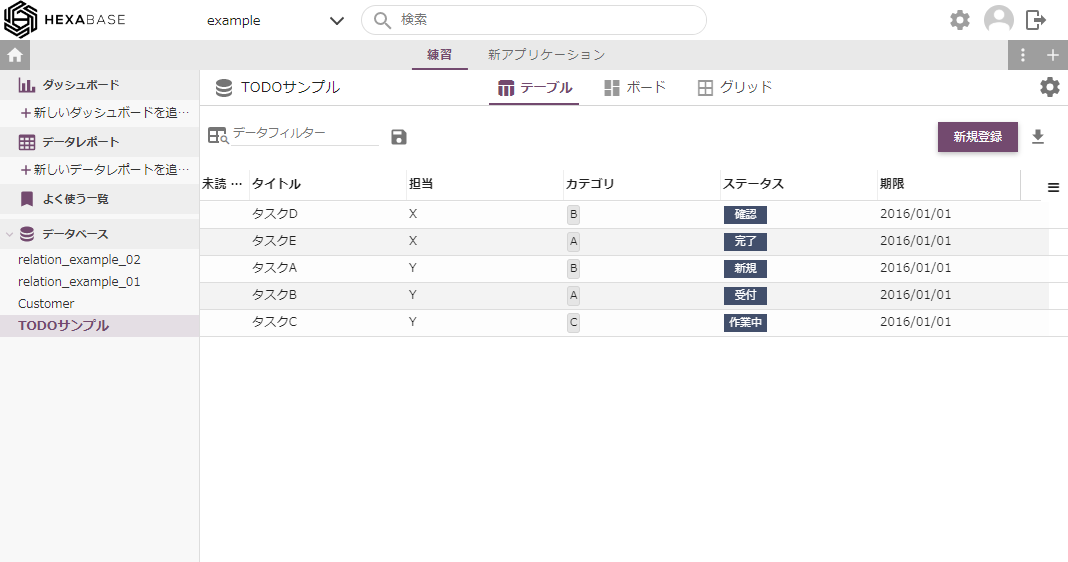
Table view > Sort
In table view, you can sort the data list by column name by clicking the column name.
Table view > Initialize layout
In a table view, when you sort or adjust column widths, the layout will be saved as default or a confirmation pop-up will be displayed.
Board view
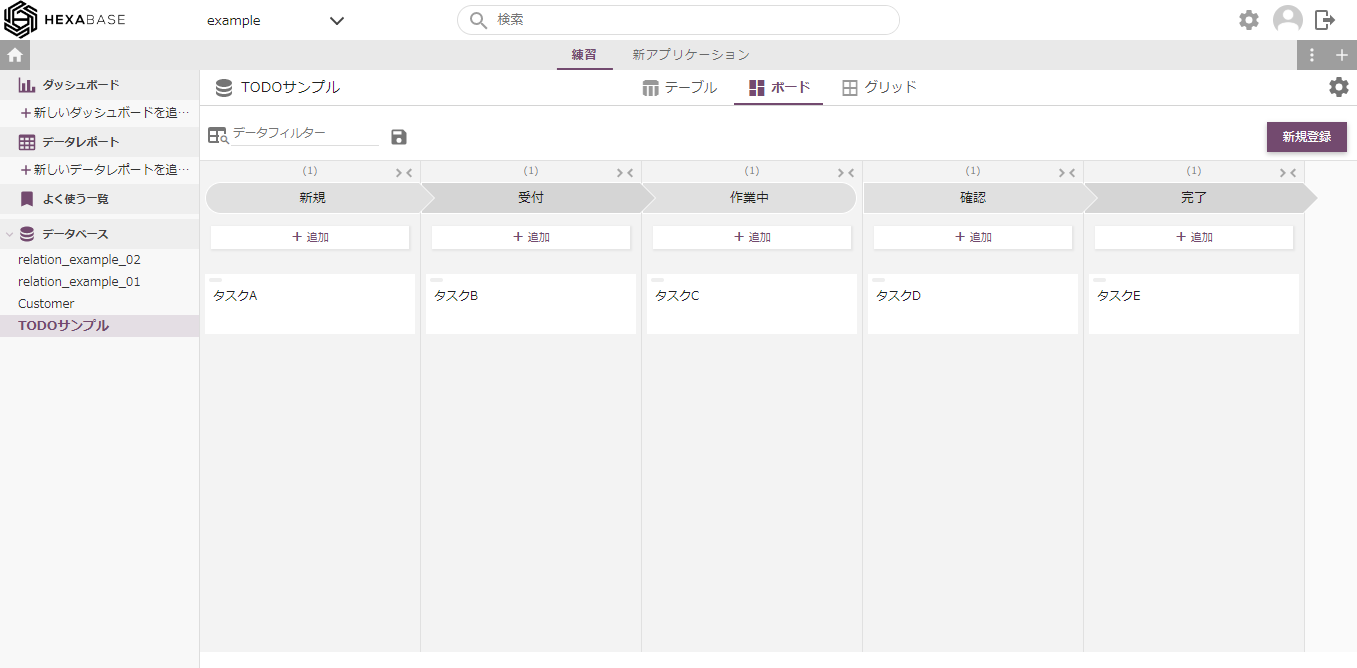
Board view is a view that organizes items by status and can be used as a task management tool.
In Hexabase, if there is a field called "Status" in the database, it can automatically be used as a workflow step name. And in board view, you can see the progress by status.
Grip view
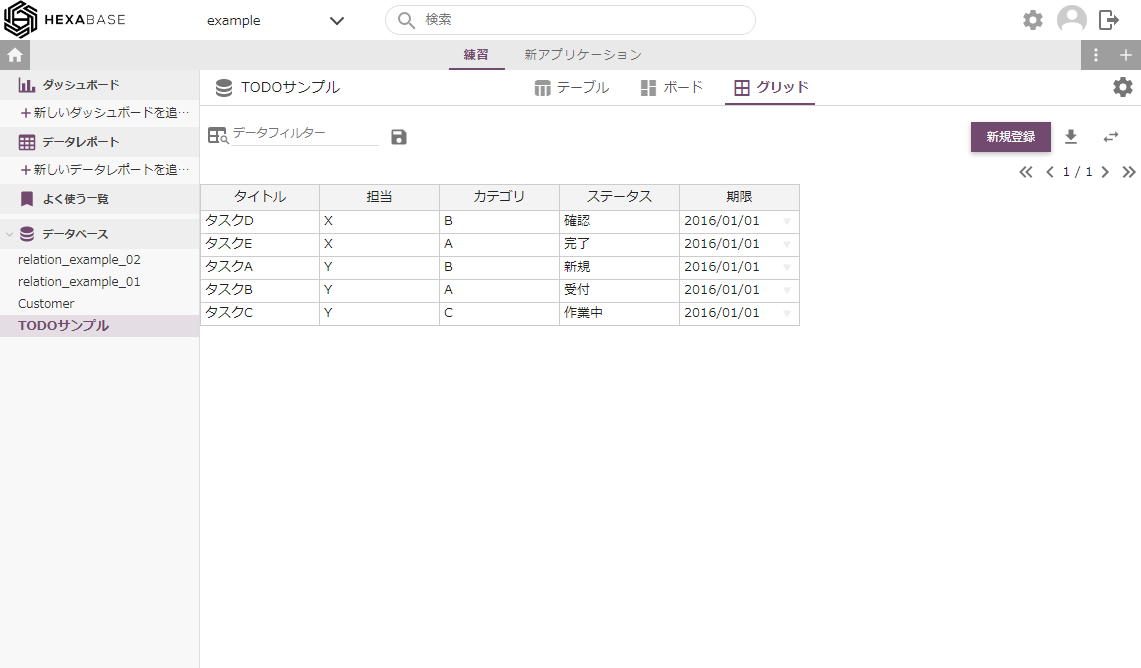
A grid view is a panel that displays a database like a spreadsheet. Grid view allows you to enter and edit data in tabular form.
Grid view > Change layout
Grid view allows you to change the display order of fields.
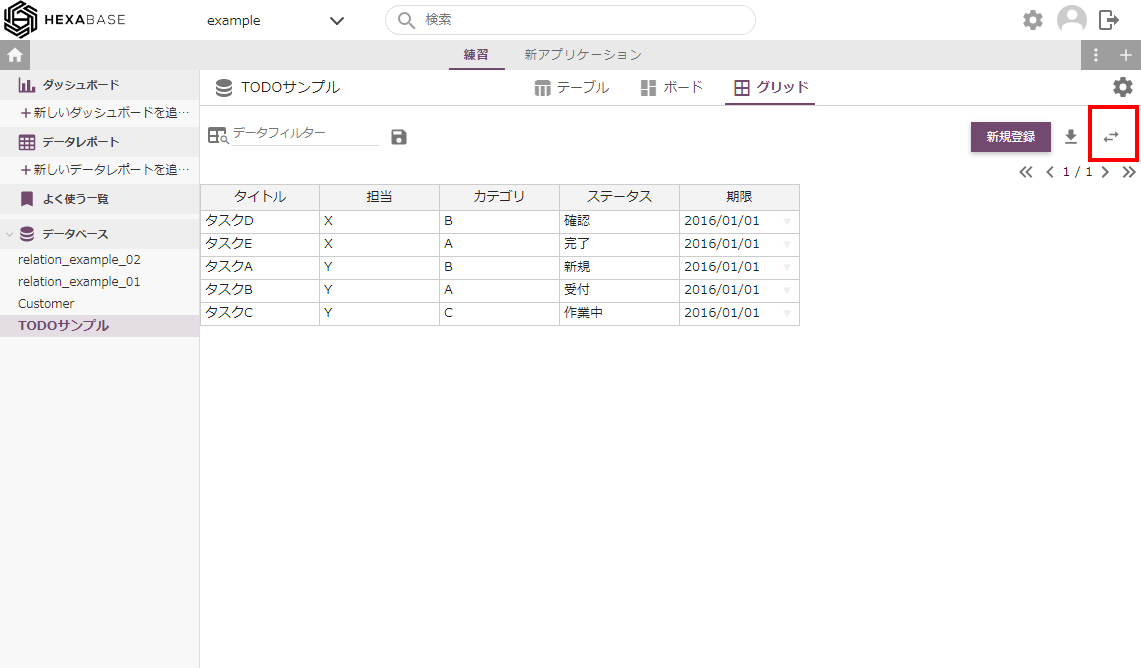
- Click the set column order button at the top right of the grid view
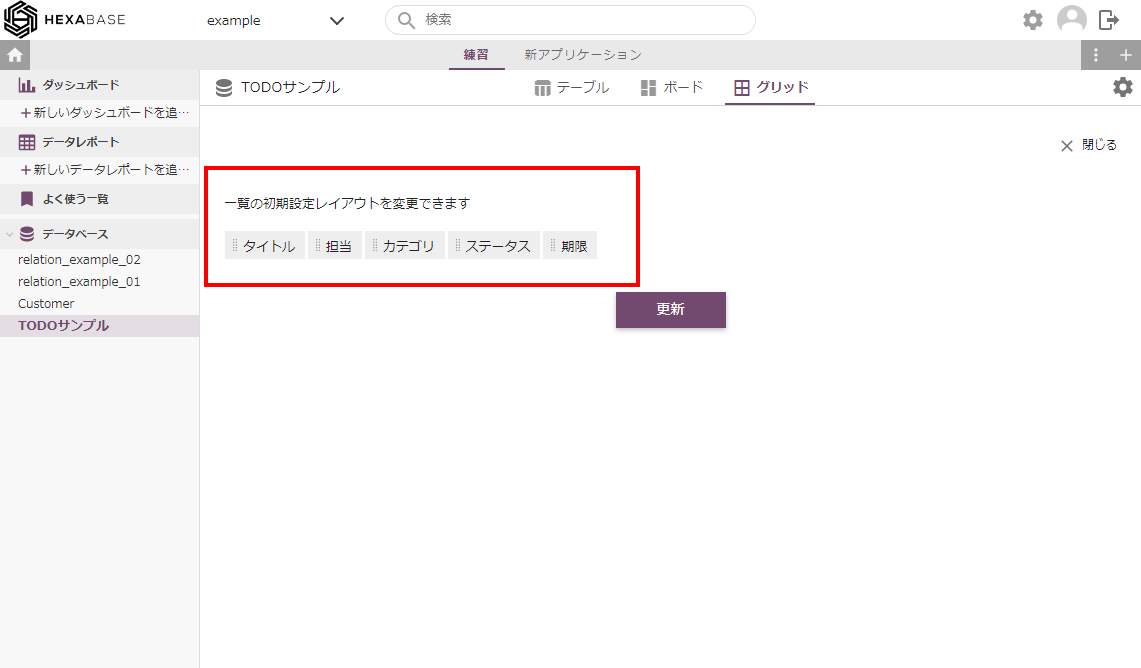
- When the default layout is displayed, drag and drop to specify the display order of the fields.
- Click on the update button
Search(Data filter)
In a view, you can use data filters to narrow down the data displayed. Refinement conditions can be saved in the frequently used list and recalled from the data filter, left menu, or home screen.。
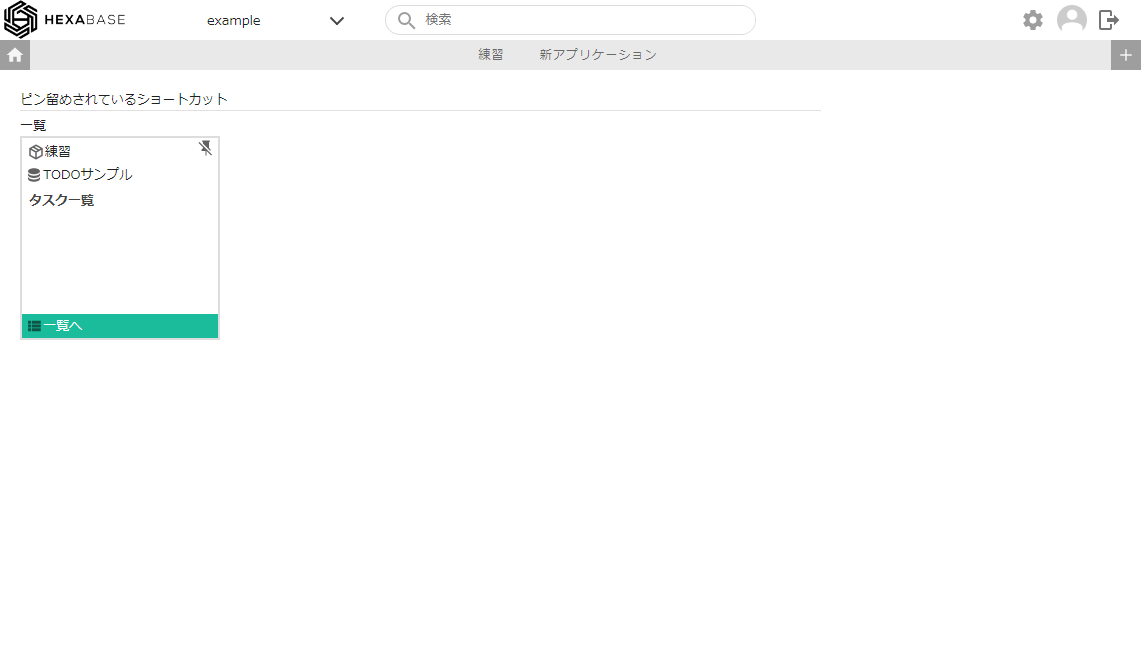
Set filter conditions
- Click on data filter
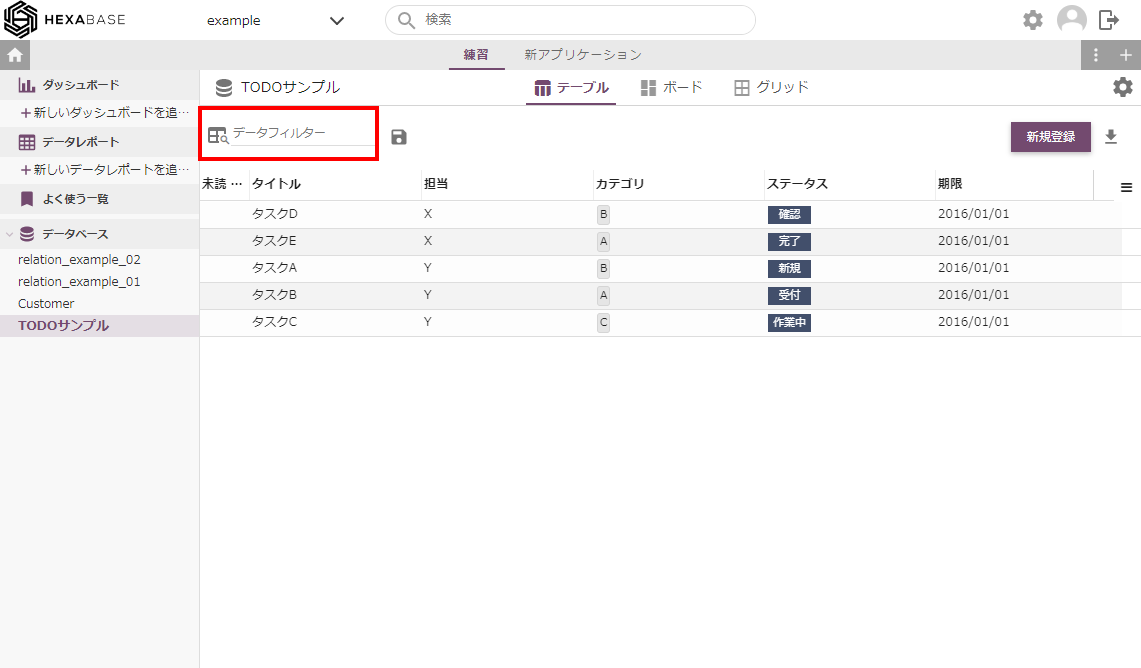
- In the data filter pop-up, select the item name to be filtered.
- Specify filtering conditions
- Click on the filter button
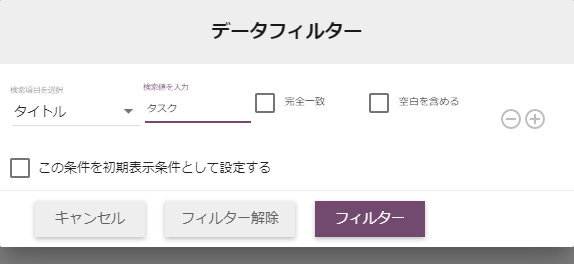
Set filter conditions as initial display conditions
To set the refinement condition as the initial display condition, in the data filter pop-up, check set this condition as the initial display condition.
Remove filters
In the data filter pop-up, click the clear filter button
Save filters
- Click the save this query button in the data filter
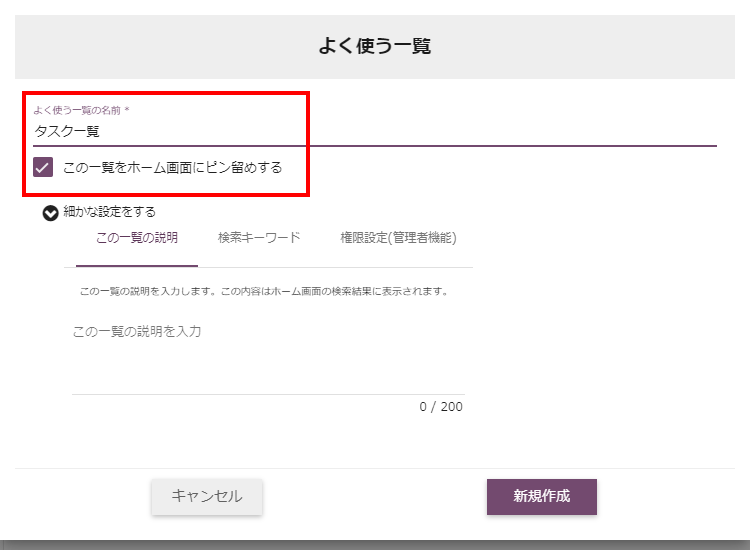
- When the frequently used list pop-up appears, enter the name of the frequently used list and click the create new button.
Refine data while operating
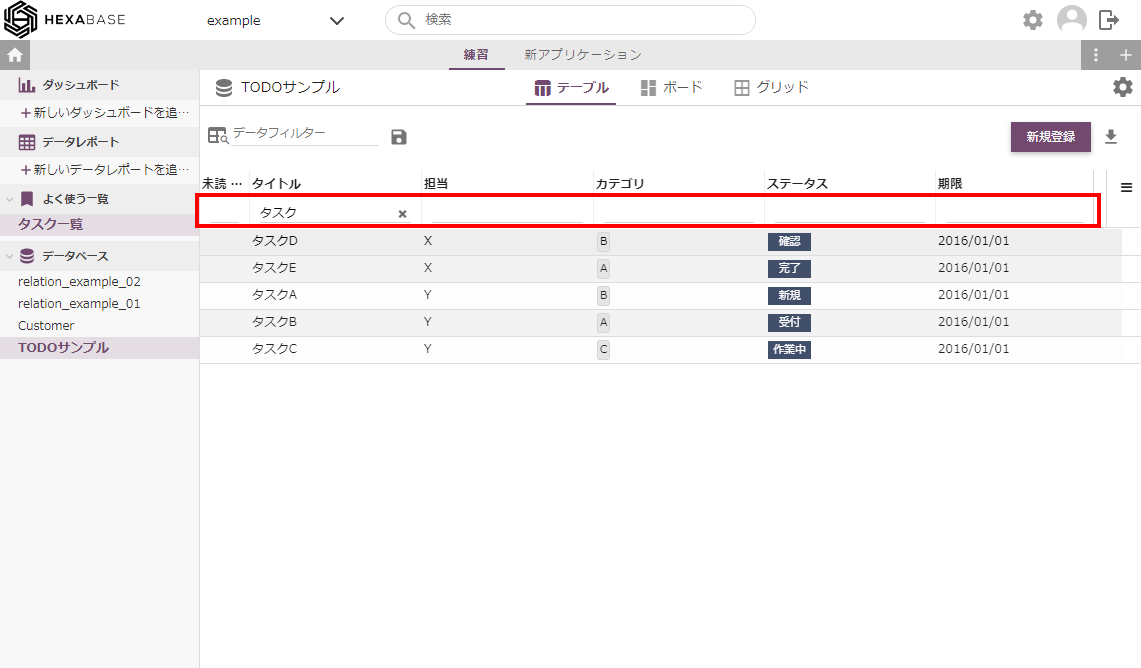
In the table view, you can use toggle filtering to narrow down the data while operating the data list.
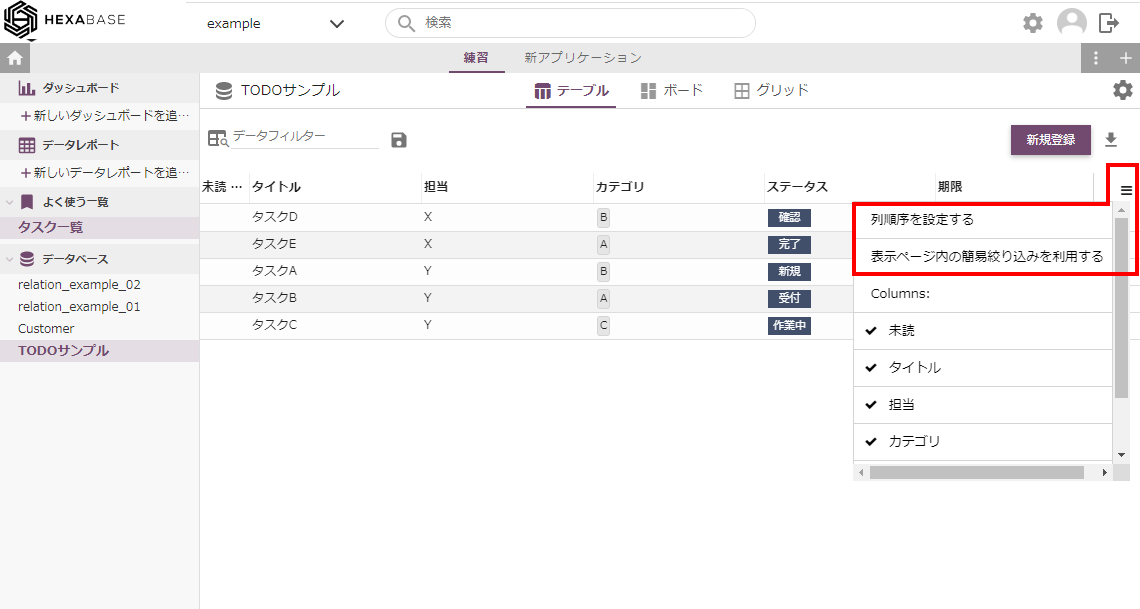
- In table view, click the Menu button at the right end of the column
- Select use the toggle filter function in the display page
- When the condition input field is displayed above the column name, enter the filtering conditions
Useful function
Collapse menu
The Data operations menu can be collapsed in the Item Details popup.
Pin to home screen
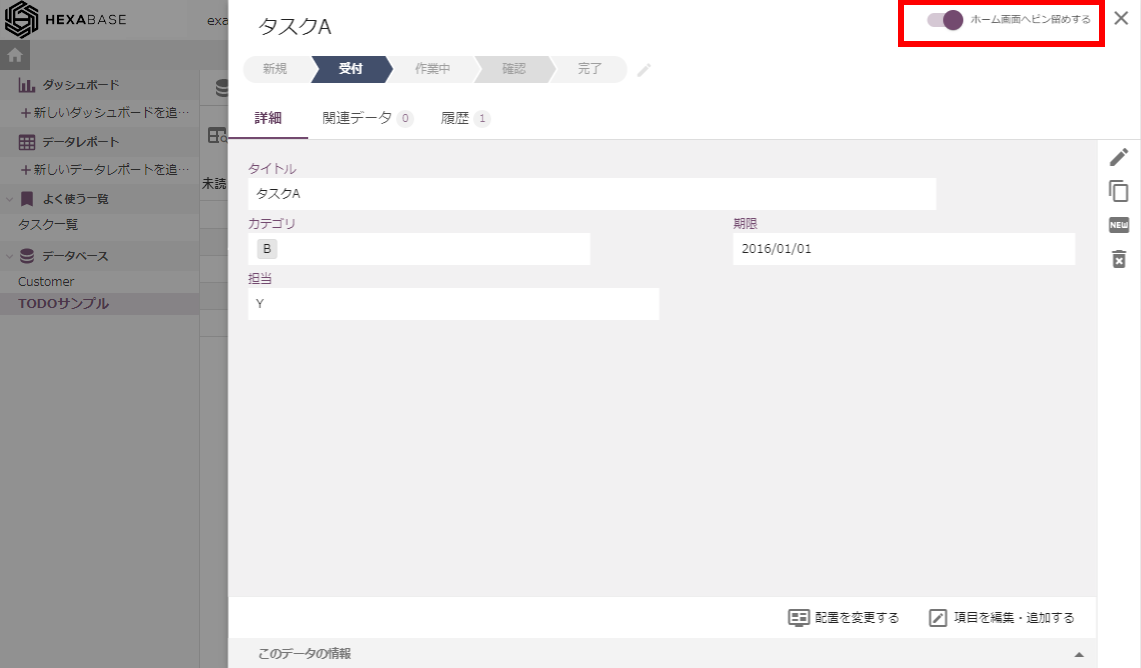
To pin specific items to your home screen:
- Call item details pop-up
- Enable the pin to home screen switch in the top right corner
Check relation data
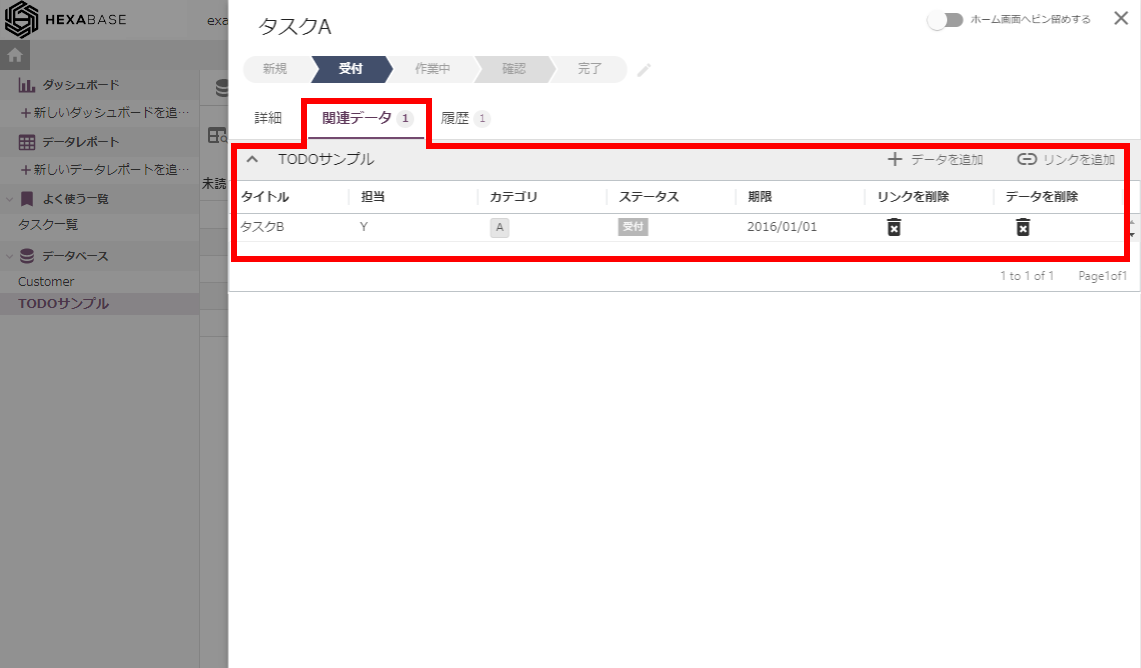
You can register relation items as relation data.
To see relation data, in the item details pop-up, click the relation data tab.
Register existing data as relation data
To register existing data as relation data, proceed as follows:
- In the item details pop-up, click the relation data tab
- Click on the add link icon
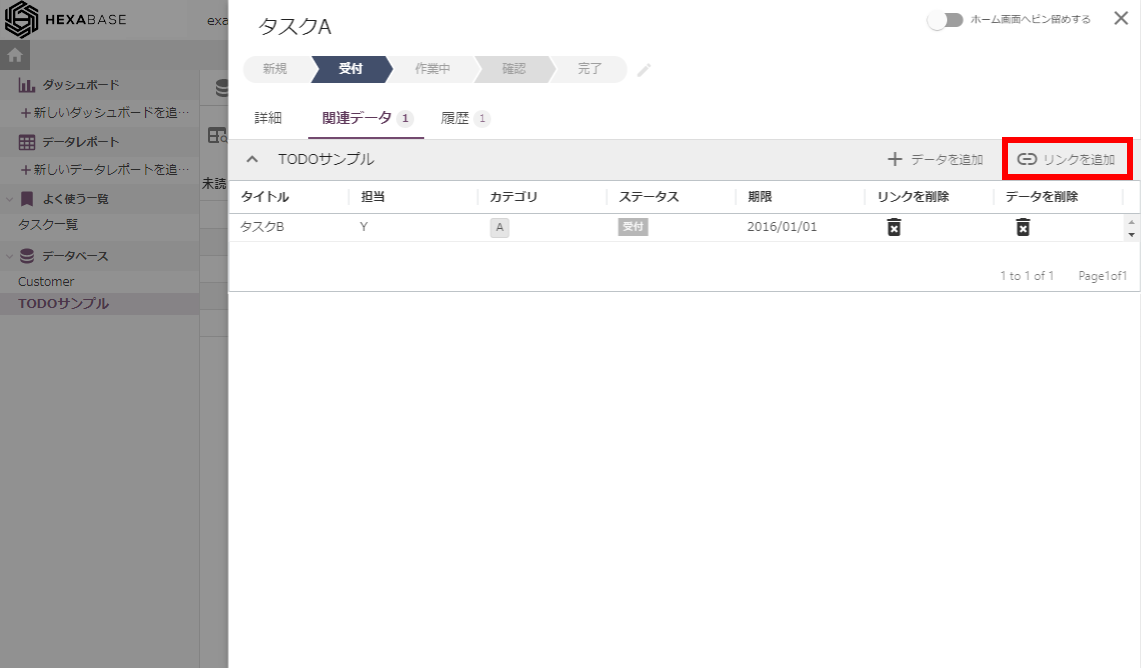
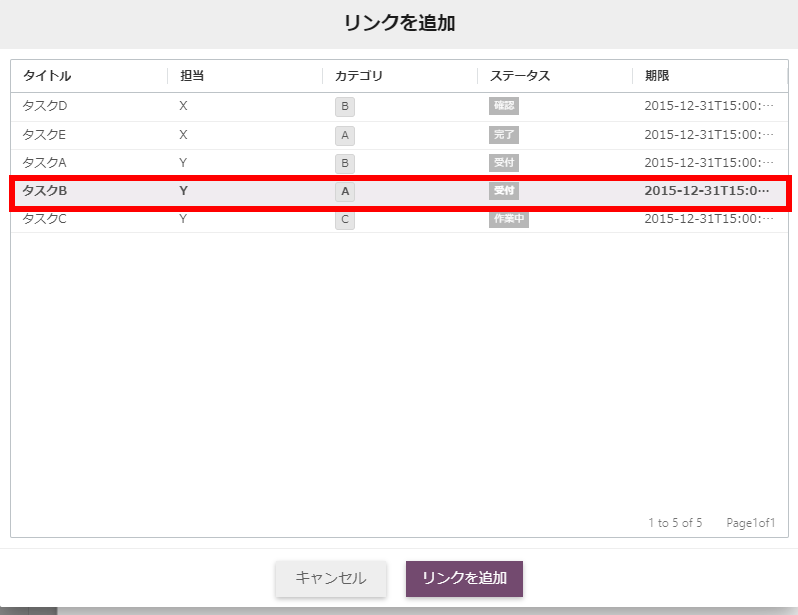
- When the add link pop-up appears, select the data you want to relate
- Click the add link button
Add relation data
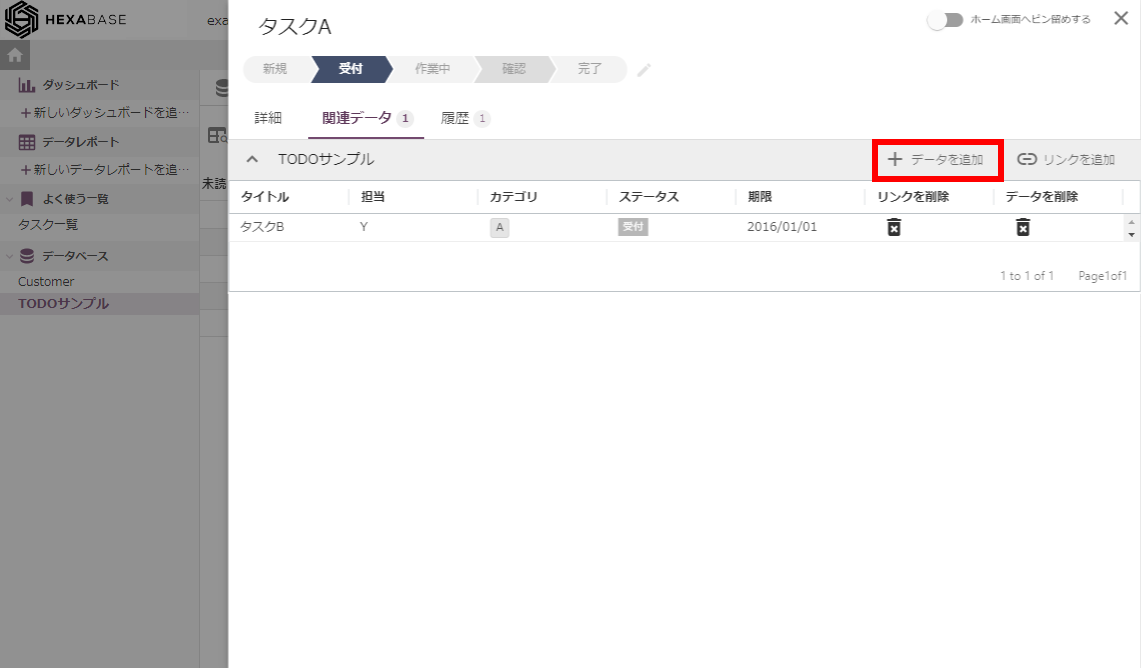
To add a new relation item, do the following:
- In the item details popup, click the related data tab
- Click the add data icon
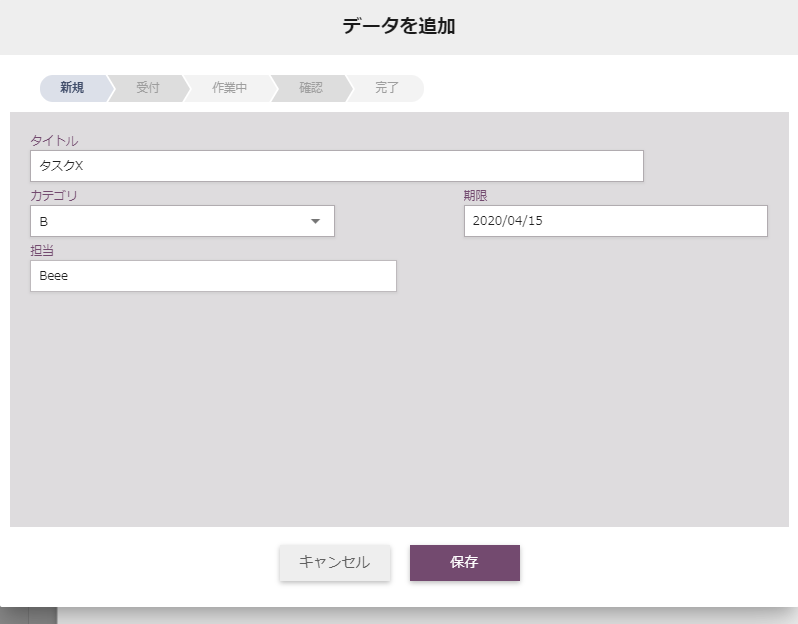
- When the add link pop-up appears, select the data you want to relate
- Click the add link button
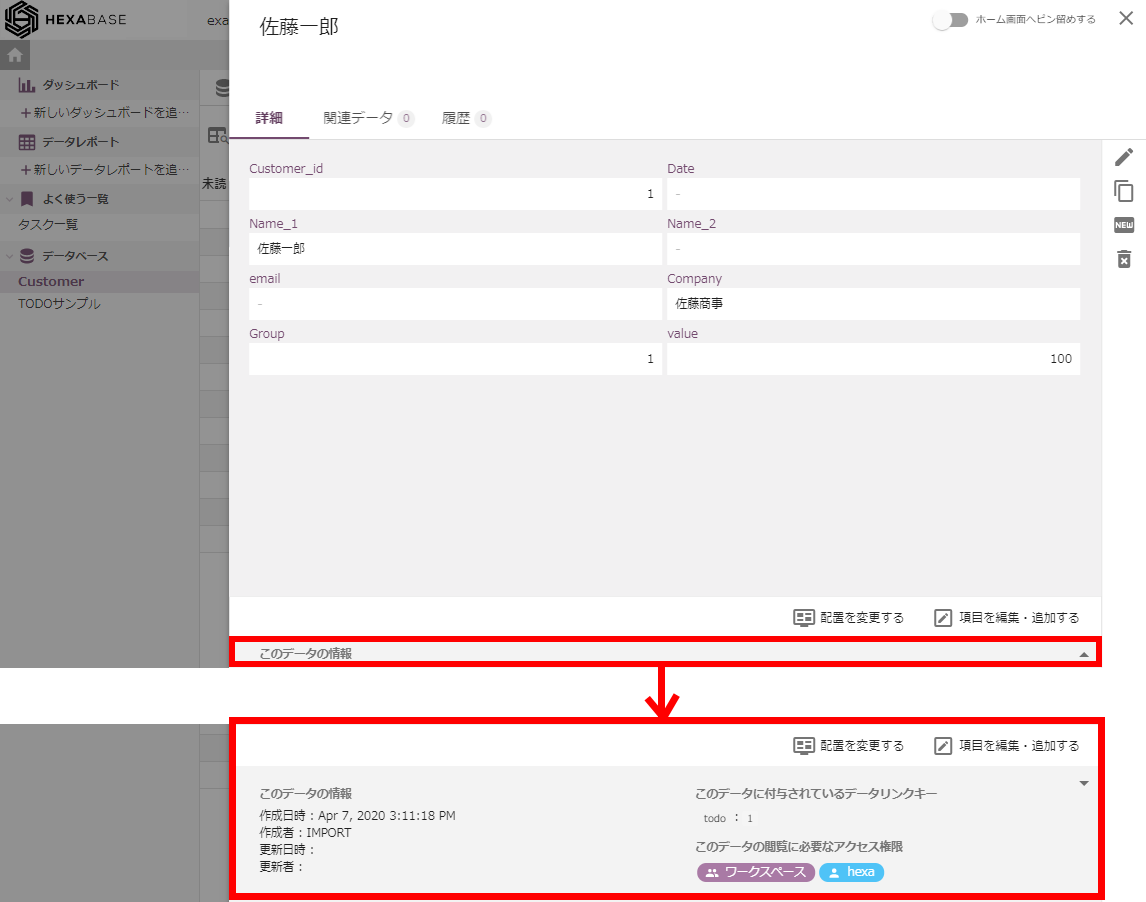
Check information about this data
You can check the item's metadata. You may view the date and time the data was created, who created it, who modified it, who updated it, access rights, and so on.
- In the Item details popup, click the ▲ button for Information about this data
CSV download
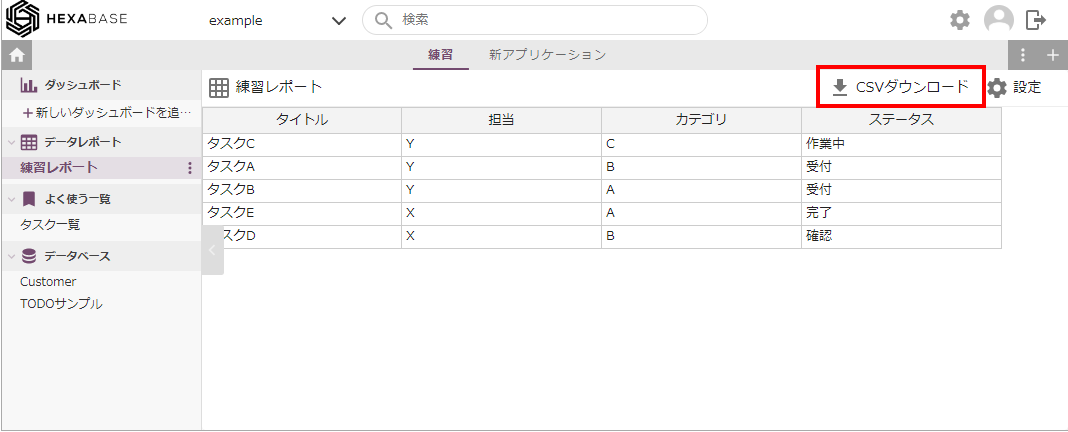
The data displayed in the view can be downloaded as a CSV file. At this time, if you have narrowed down the data to be displayed using a data filter or toggle filter, you can download only the filtered results.
Click the download button to download the CSV file.
