Action and Status Settings
In Hexabase, you can change the database actions menu (actions) and status actions in the item details pop-up.
※The admin role is required to change these settings.
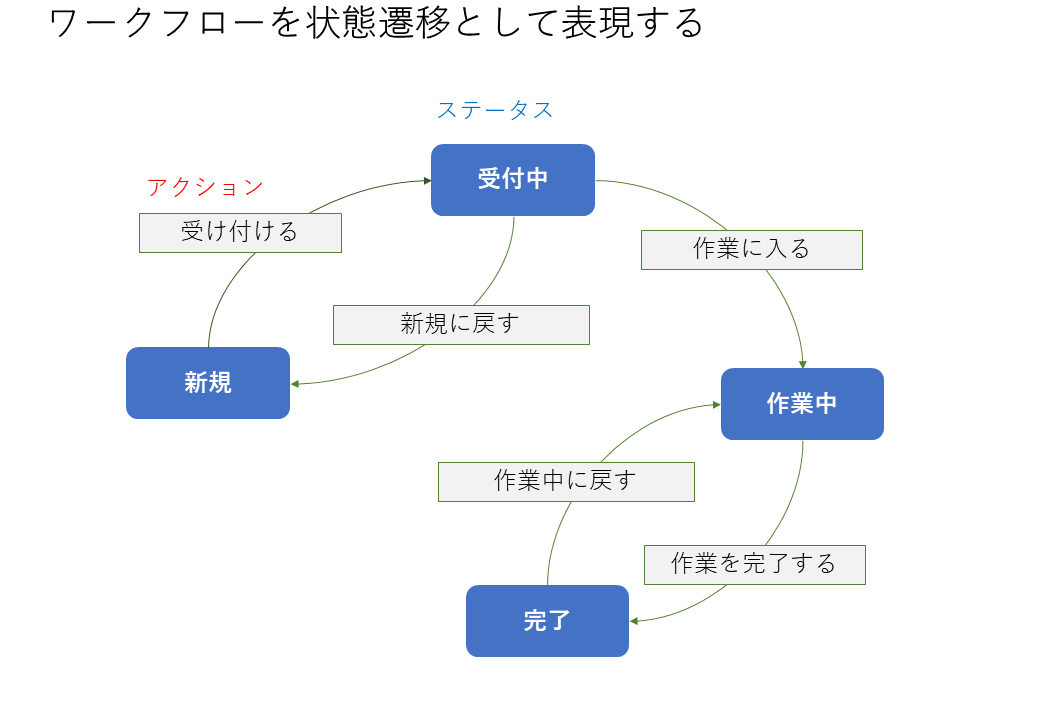
Action and Status
In system development using Hexabase, efficient and versatile screen design is possible by combining the status of items and the actions that cause status changes.
For an overview of actions and statuses, please refer to feature guide > Backend feature configuration in the "State transition based BPM workflow".
Change data operation menu (action)
The item details pop-up uses the menu to database actions or status actions. This menu can be reordered, new menu items can be added, and it can be configured for each database.

Change the menu order
The order of display can be changed for each menu category, such as "database actions" and "status actions".
- Click the [ ⁝ ] button in the menu category
- Click change menu order
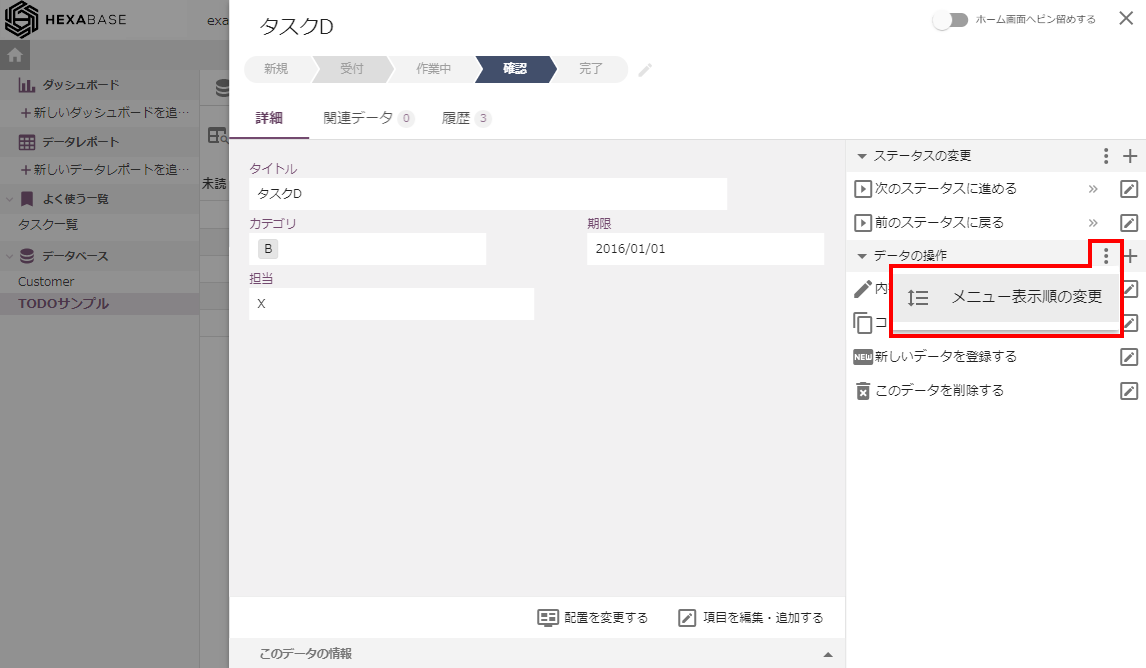
- Drag and drop to set the menu order
- Click on the [ ⁝ ] button again and select __Change menu order*
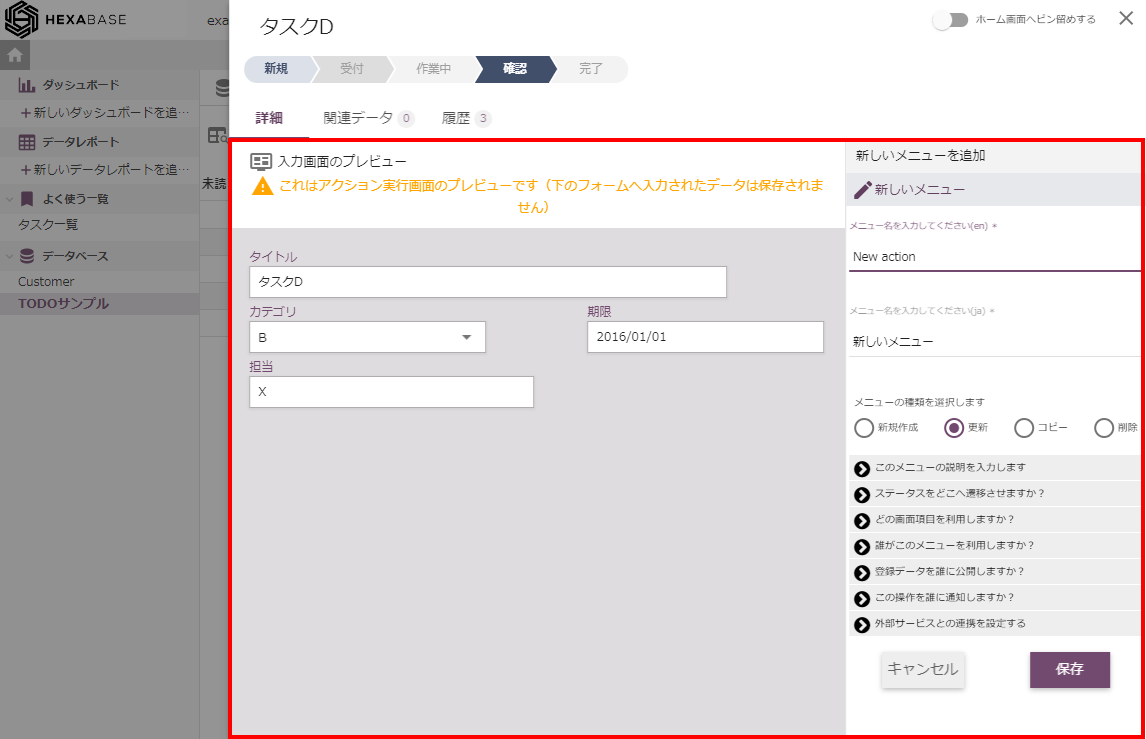
Add new menu
- Click the [+] button in the menu category
- Preview input screen^ set the menu items when the pop-up appears
- Click on the save button
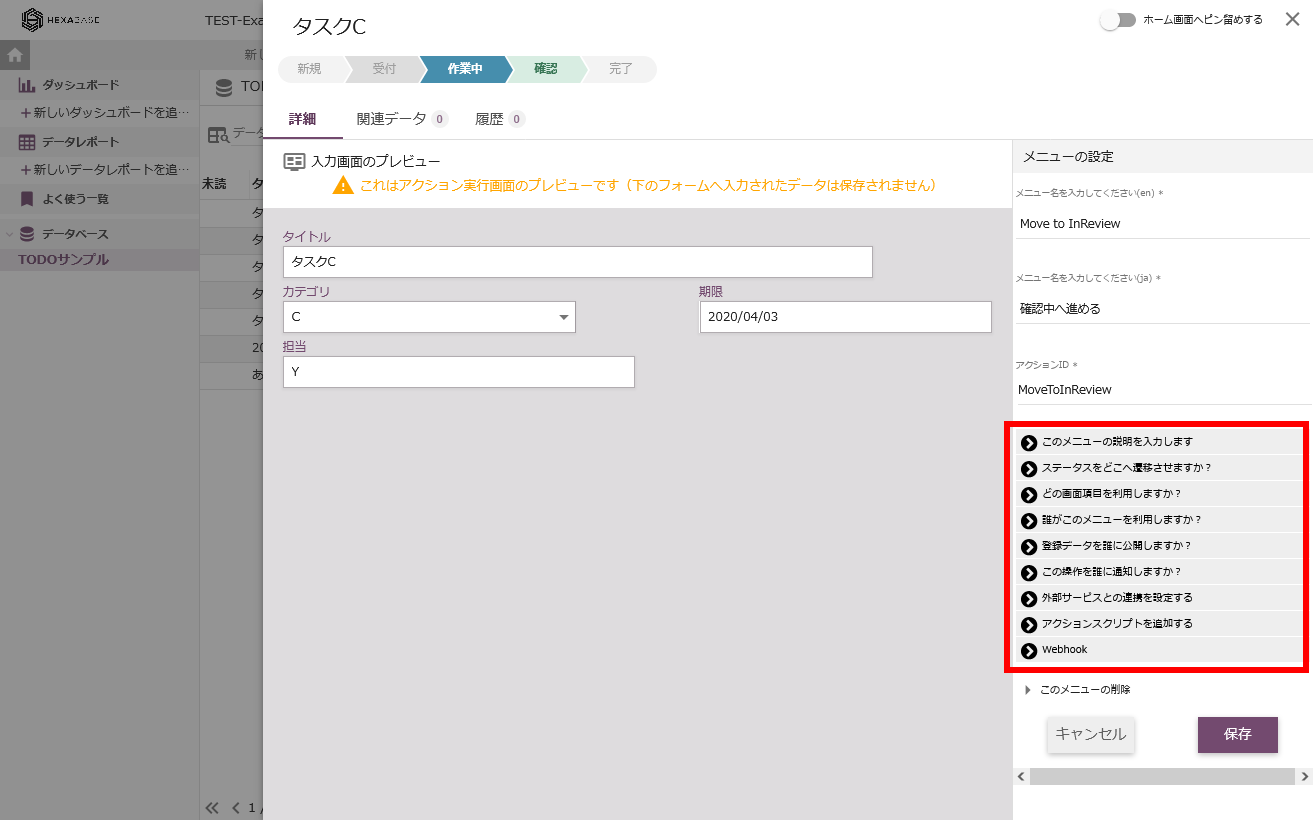
Change menu item settings
To change the settings of an existing menu item, click on the pencil icon on the menu item.
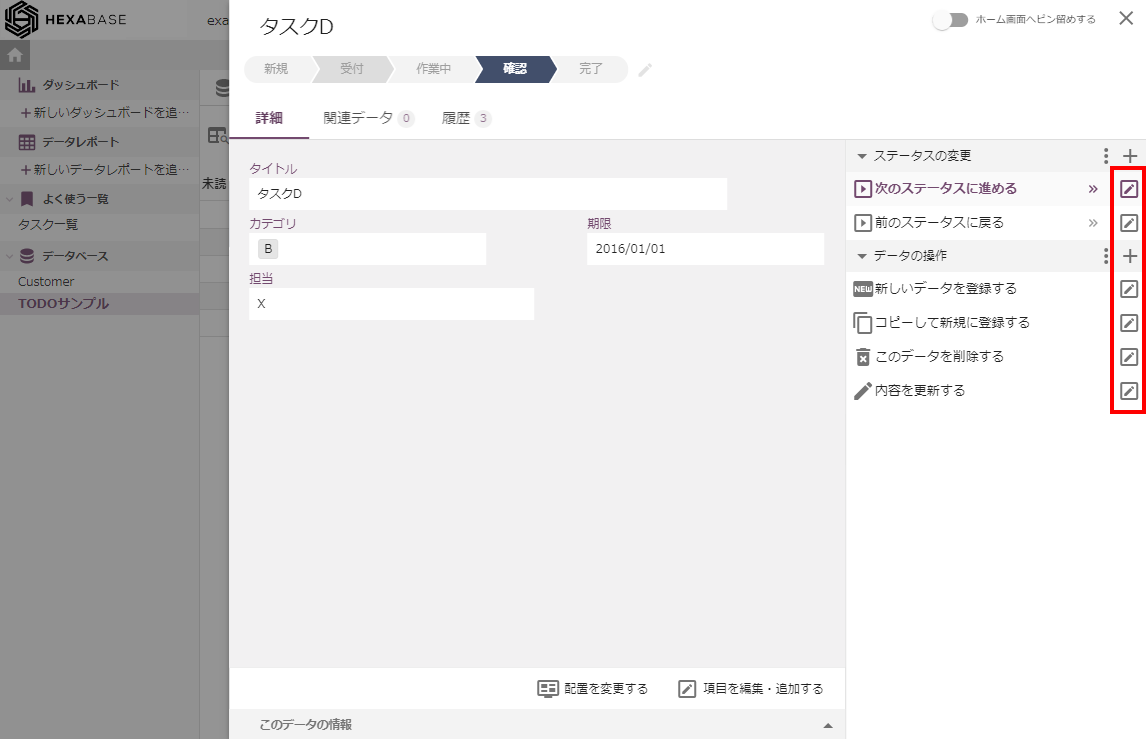
The following options are available through the menu item:
- Menu description
- Status transition destination
- Page items to use
- User who can operate(Role)
- Users who publishes data(Role)
- User to be notified of changes(Role)
- Interaction with external services
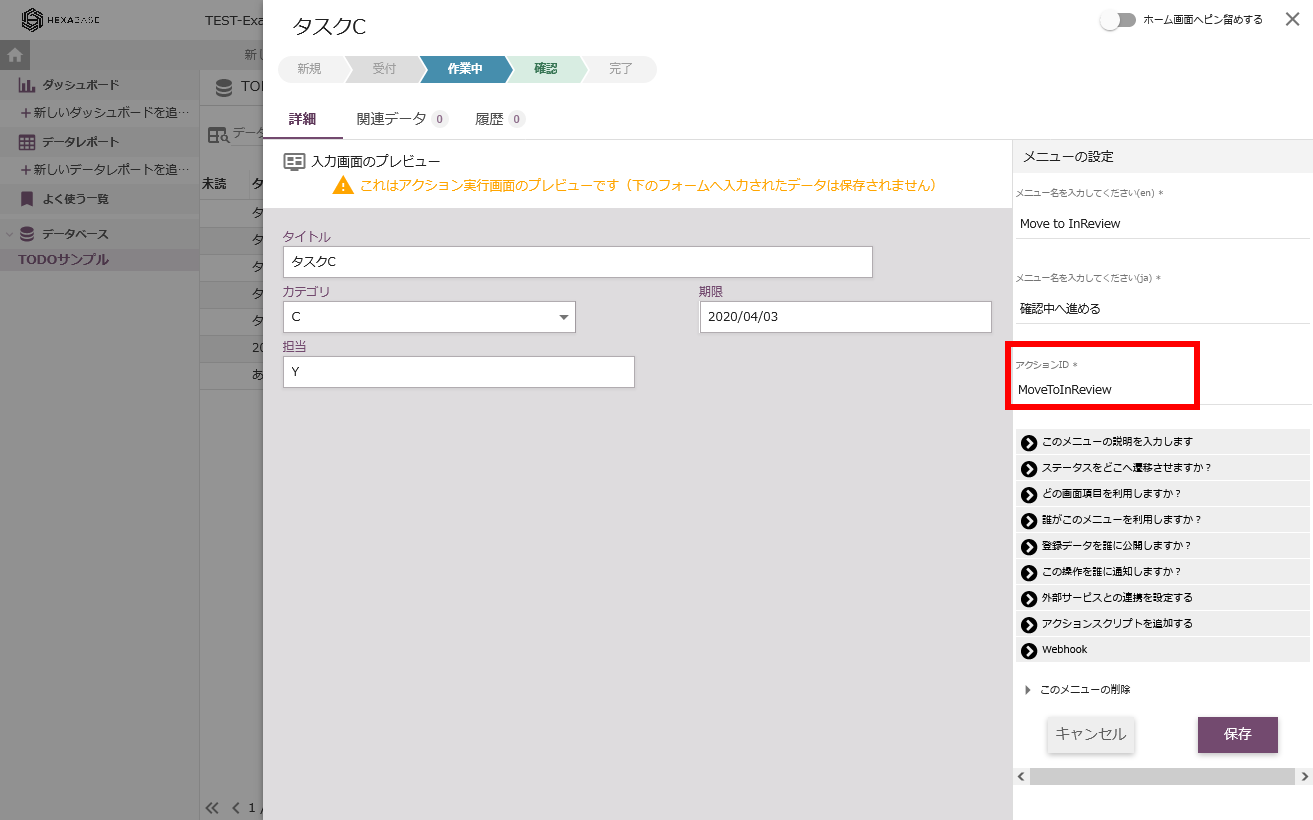
Set action ID
To check and set the action ID, turn on user developer features in "User profile settings > "Personal settings".
- In the menu item, click the pencil icon for any status
- set the action ID in "Menu settings"
- Click the "save" button
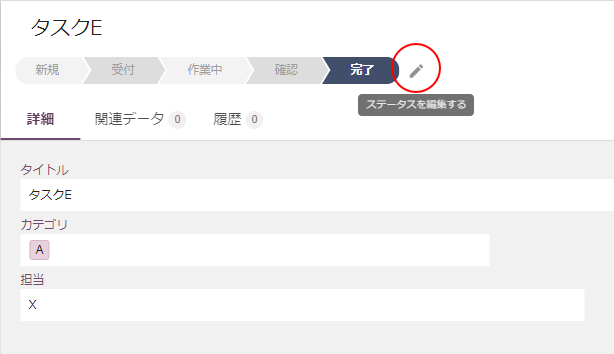
Change status settings
On the item detail screen, you can call the status edit screen to change the status.
Edit status page
- Select an item
- Click "Edit status"
Edit status name
- On the "Edit status" screen, click ":" for the status you want to edit.

Delete status
You can delete a status by doing the following:
- Select an item
- Click "edit status"
- On the "edit status" page, call up the edit menu for the status you want to delete.
- Click “delete status” in the “Edit status name” pop-up
- When "are you sure you want to delete the status?" is displayed, click "OK"
- The "edit status name" pop-up appears, click out of pop-up
- Click the “save” button on the “edit status” screen
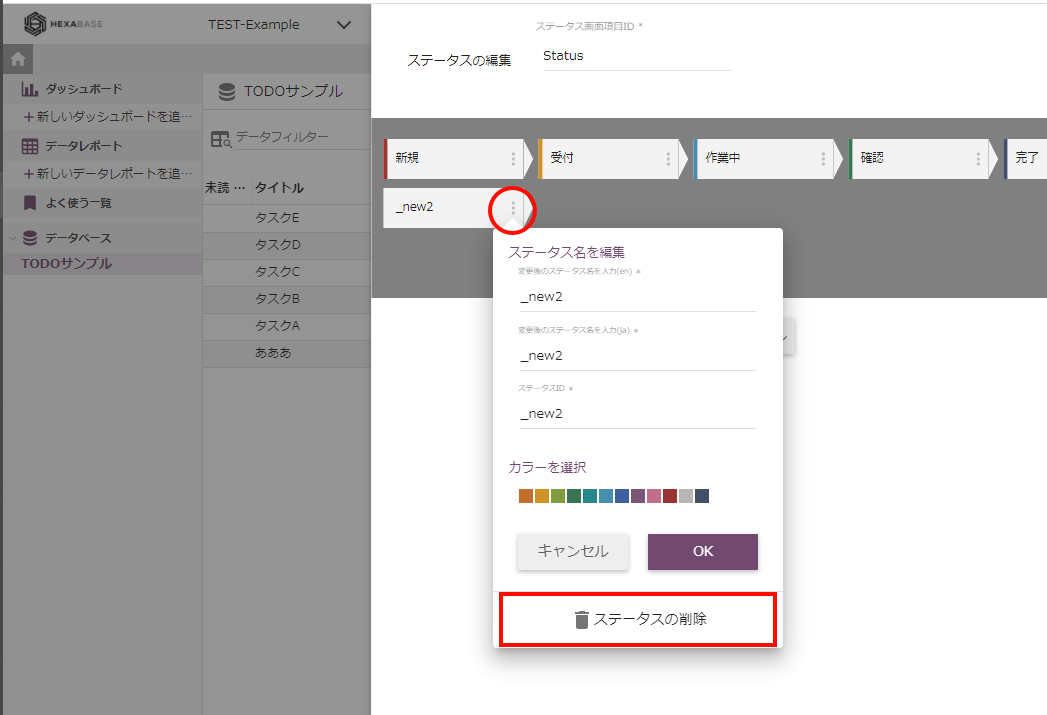
If the message "cannot save because of duplicate status name" appears when clicking the "save" button on the "edit status" page, change the status ID to something unique when the "edit status name" pop-up is displayed.