Step4. Register your app with the CLI tool
Hexabase CLI (Command Line Interface) is an auxiliary tool for developers that allows them to manipulate Hexabase data more easily. It is published on npm, and anyone can use it freely.
Demo Video
Prepare CLI tool
First, Let's prepare to use the CLI tool.
Things to prepare in advance.
To use the CLI tools, you will need the following tools: Install the tool according to your OS. For information on how to use each tool, please refer to the official website.
- node.js
- npm
Install via npm
The CLI tools is installed with npm
To install, run the following command:
$ npm install -g hexabase-cli
※ If you get an error when you run the CLI tool command,install the old version by following the steps below.
$ npm uninstall -g hexabase-cli
$ npm install -g [email protected]
※ Below is an command list for the CLI tool.
CLI tool environment settings(First time only)
Only for the first time, execute the following environment setting command.
The CLI manages the access destination environment in units called contexts. By using contexts, you can easily switch between staging and production environment.
Create a context with the following command
$ hx contexts:set [CONTEXT]

ARGUMENTS
| CONTEXT  context name

OPTIONS
| -h, --help       show CLI help
| --server=server  API server, e.g. https://api.hexabase.io
| --sse=sse        SSE server, e.g. https://sse.hexabase.io
In the following examples, we specify the environment we are using and name it 「dev」.
$ hx contexts:set dev --server=https://api.hexabase.io --sse=https://sse.hexabase.io
Basic operation of the CLI tool
The flow of operating Hexabase with the CLI tool is as follows.
- Choose a context
- Login
- Choose a workspace
- Execute the required command
Some commands have short aliases.
1.Select Context
The context can be manipulated with the following commands
See context
$ hx env
| NAME   SERVER                           SSE
| dev    https://api.hexabase.io     https://sse.hexabase.io
If there is more than one context, it will be displayed
$ hx env
| NAME   SERVER                           SSE
| dev    https://api.hexabase.io         https://sse.hexabase.io
| stg    https://stg-api.hexabase.io     https://stg-sse.hexabase.io
Select context
$ hx use
| √ Select your current-context · dev
| Current-context successfully set to:dev
2.Login
To log in to Hexabase with the CLI tool, execute the following command.
$ hx login
| ? Enter your email » [email protected]
| ? Enter your password » xxxxx
| Successfully logged in as: [email protected]
※To log in with Hexabase CLI, you need to obtain a Hexabase account ID in advance.
3.Choose a workspace
After logging in, select the workspace you want to use.
Check workspace
$ hx ws
| ID                       NAME
| 60594049dabf490001d84684 demo_workspace
| 60d45d336d66ed844b1190fe demo_developer
| Current-workspace set to: demo_workspace
Select workspace
$ hx sel
| √ Select your workspace · 60d45d336d66ed844b1190fe
| Current-workspace set to: demo_developer
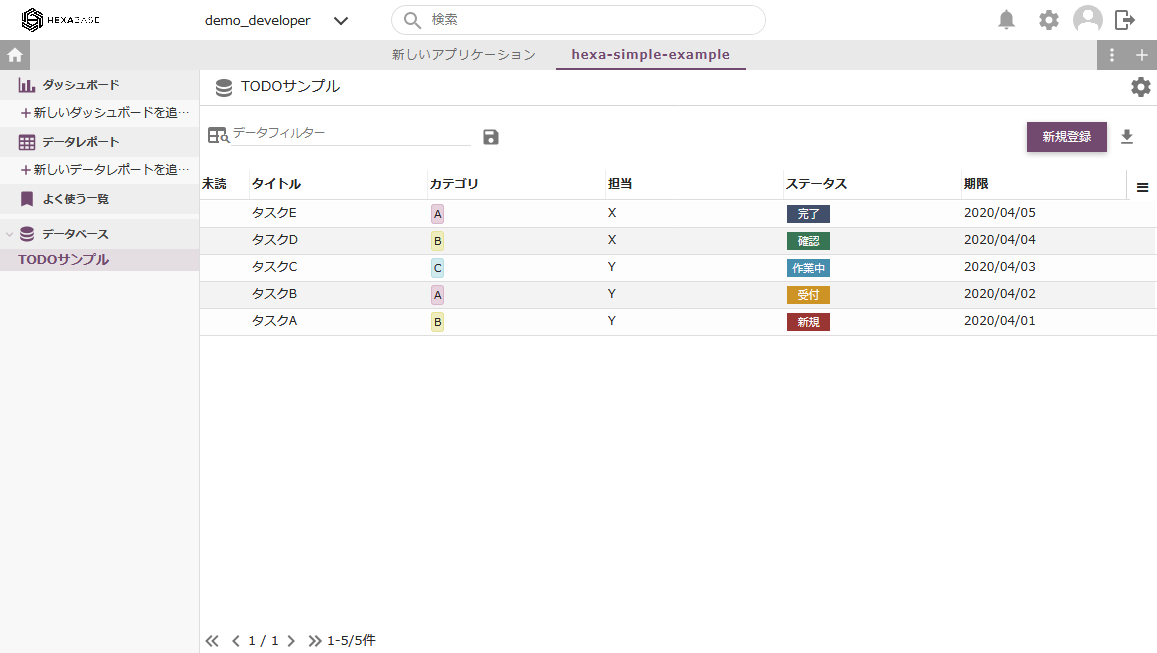
Install ToDo sample
Hexabase allows you to create apps from application templates.
To create an application with the CLI tool, use the hx projects:create command.
$ hx projects:create
At this point, you can select the original application template from the menu.
To create a TODO example, select 「hexa-simple-example1」 and specify the English name and Japanese name of the app (eg hexa-simple-example).
? Select a template ...
| none
| hexa-gantt-example 60629c3b7fb47c0001fe1ae2
> hexa-simple-example1 5f525733e2fb440001214111
| new_application 60d4824255616b5013f5c3d3

√ Please provide the name for your project
Project Name (en): hexa-simple-example
Project Name (ja): hexa-simple-example
Task successfully queued. project_id set to: 60d5b2bbfc2b8d27e799d8b6
You now have the application you created (hexa-simple-example) in your workspace.
You can check the backend of the ToDo sample by refreshing the admin panel.
Related Page
- Basic operation of the CLI tool
- Create an application from a template with CLI
- Import/export templates files with CLI
Next, let's access this TODO sample application with API