Function Control by Role
In most corporate systems, security controls are required according to the login user's privilege level.
Hexabase automatically filters API return values according to user, group, and role settings.
※Access keys are used to control the viewing of items.
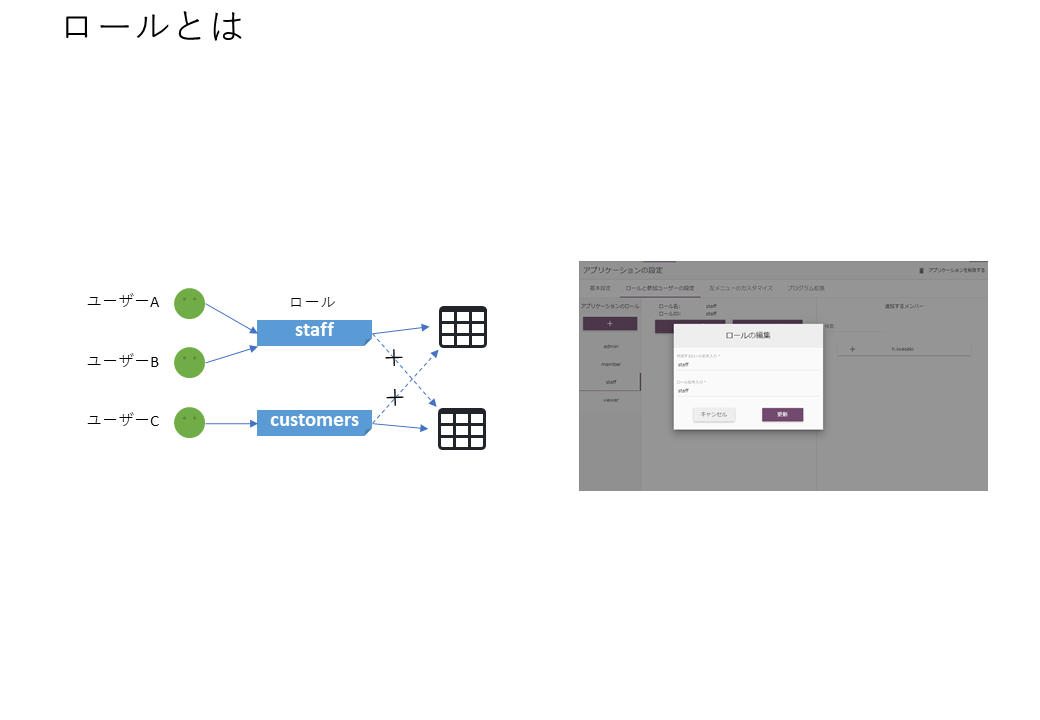
What is a role?
A "role" is a target for setting permissions for each function (database, field, action, etc.) within the application. Hexabase assigns roles that can be used for each function.
User groups can take advantage of that functionality by granting roles.
You can create any number of multiple roles within a single application. By default, two roles are defined: 'admin' and 'member'. The admin role (ID:ADMIN) cannot be deleted or modified.
※Tips:There is no limit to the number of roles, but the key is to keep it simple and minimal. If the system is divided too finely, the configuration will become complicated, resulting in a large amount of configuration man-hours and management costs, and in turn, an unsecured and uncontrollable system is more likely to result.
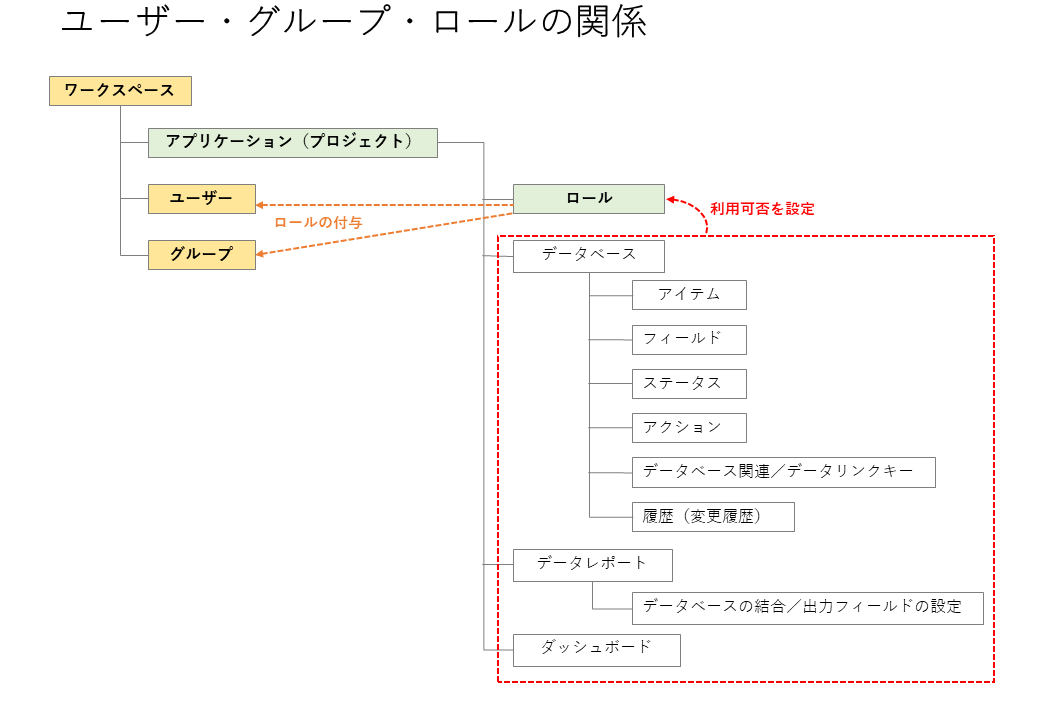
User, group, role relationships
Users and groups belong to workspaces, and roles belong to applications. In the system development of Hexabase, each function of the application sets availability for roles and grants roles to users and groups.
Granting roles to user groups
There are two ways to assign roles:
- Grant roles to users directly in the application settings.
- Grant roles to groups in workspace settings.
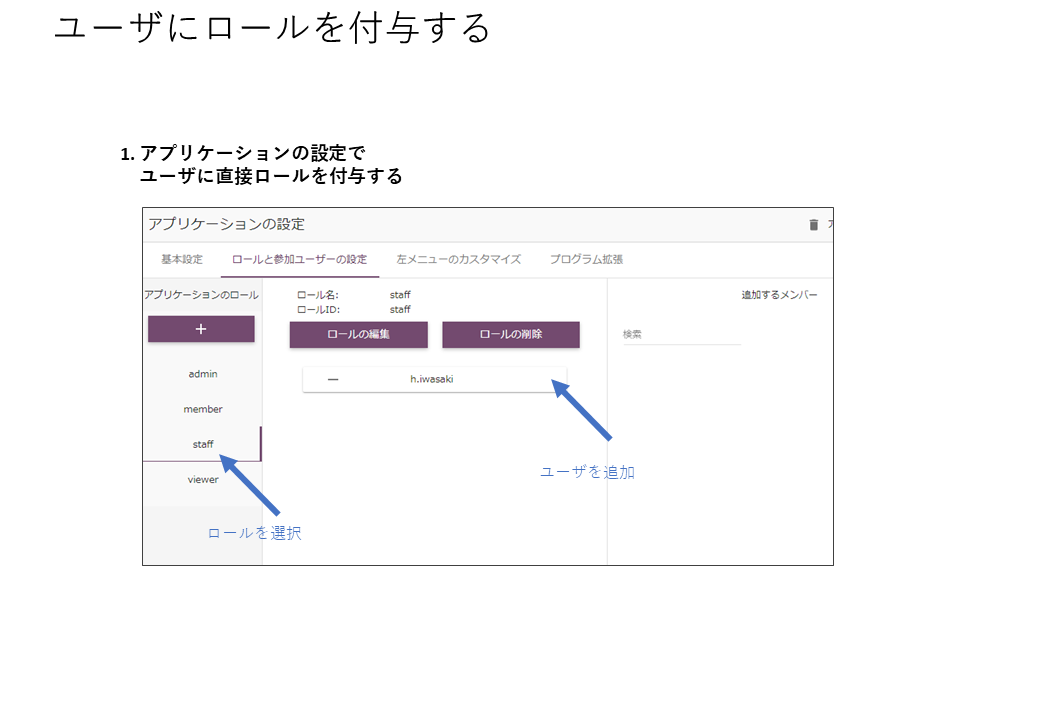
Grant roles to users directly in the application settings
- Select Application Settings > Roles and Participating User Settings.
- Select the role to grant.
- Select the user you want to grant the role to.
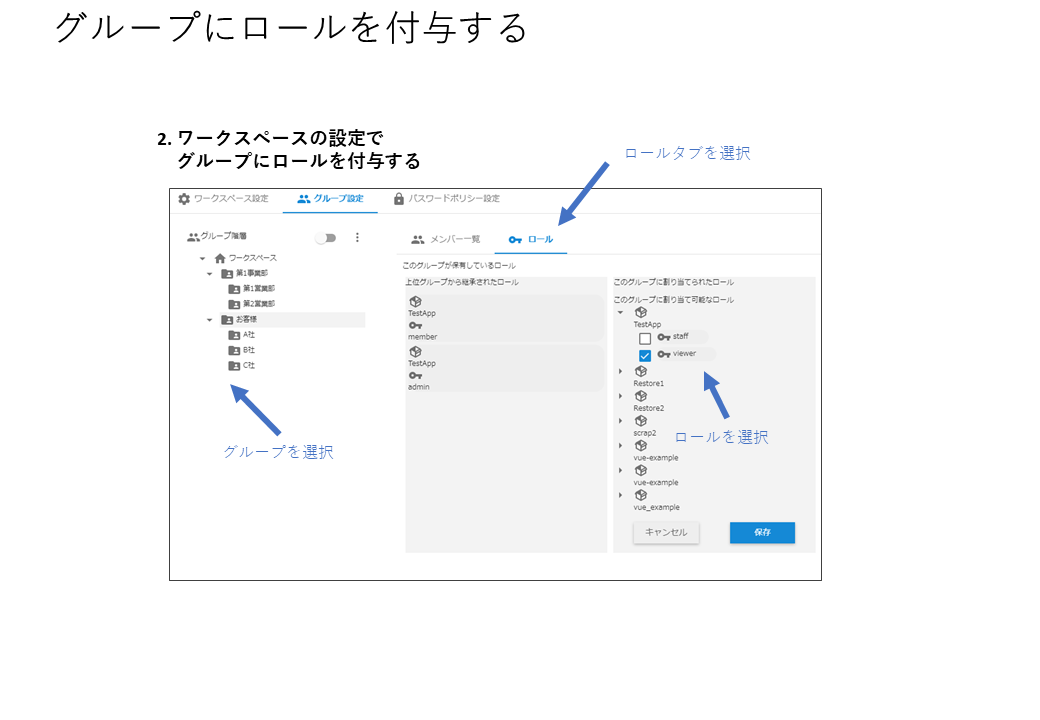
Grant roles to groups in workspace settings
- Workspace Settings > Group Settings
- Select a group
- Select the role tab
- Turn on roles to assign to groups
Grant second and subsequent application roles to the group
When a workspace is created, one application is created at the same time. The member role for this application is automatically granted to the workspace's Top group.
The second and subsequent applications created have admin and member roles, but neither is granted to any group in the workspace.
If you create a second or subsequent application, you must grant application roles to groups and users.
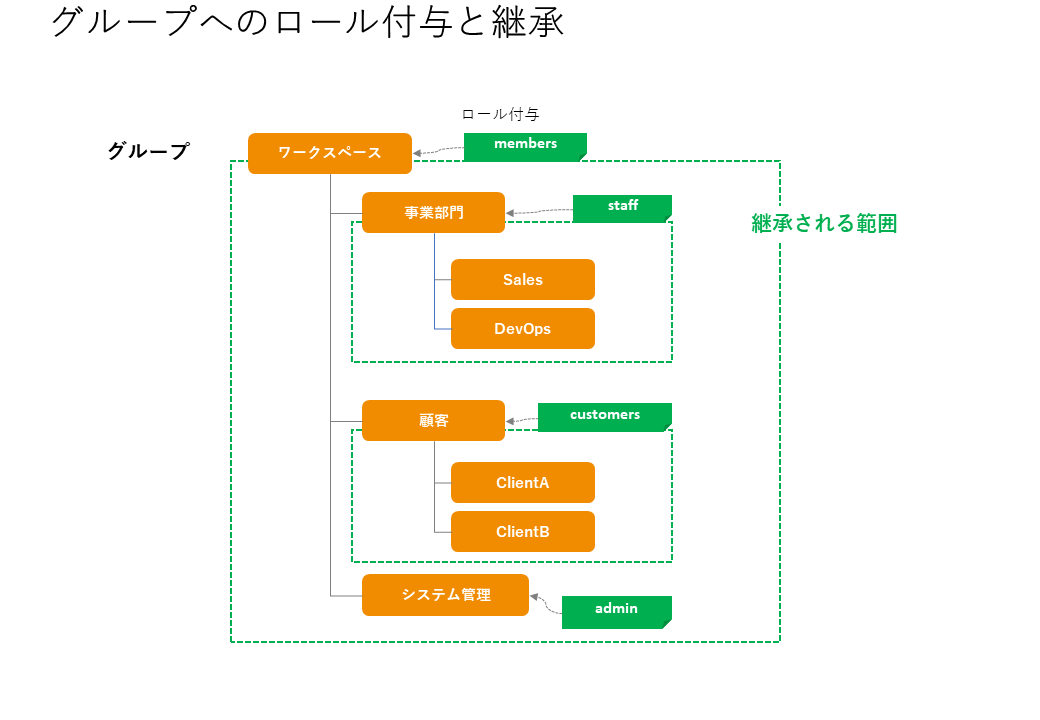
Granting and inheritance of roles to groups
When a role is granted to a group, the role is inherited down to the lower groups. By default, the top-level "Workspace" group is granted the members role.
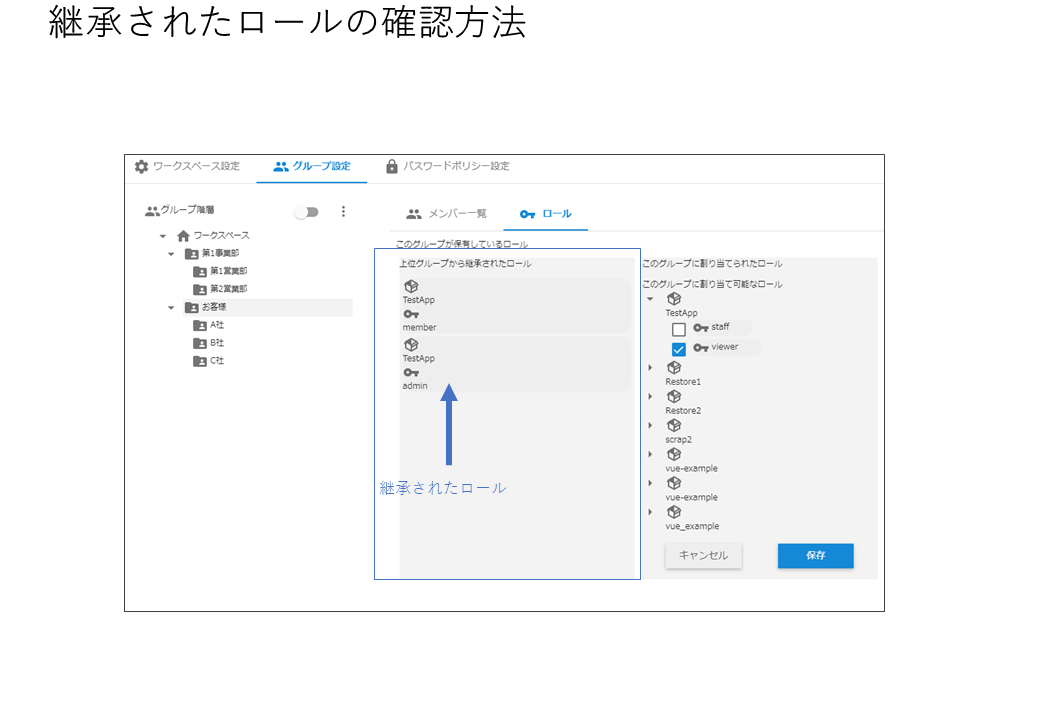
You can check the roles granted and inherited by groups in "Group Settings" in Workspace Settings.
Ability to assign roles
Privileges can be controlled by roles, mainly with the following functions:
| Identification target | Action | Behavior without permission |
|---|---|---|
| Database(datastore) | Accessing the database | The corresponding database is not retrieved in the API results. |
| If display_id is specified in the REST URL, a permission error will occur. | ||
| Field | Display or hide fields | API results such as item lists and details do not include the field. |
| Data report API results do not include the referenced field. | ||
| Action | Display or hide in the action list | Not included in the action list JSON. |
| An error occurs when the corresponding action cannot be found. | ||
| Data report | Access to data reports | The corresponding data report cannot be obtained from the API results. |
| Chart (dashboard) | Accessing chart data | Same as above |
Specifying availability by role
For each feature, you can specify a role on the next page.
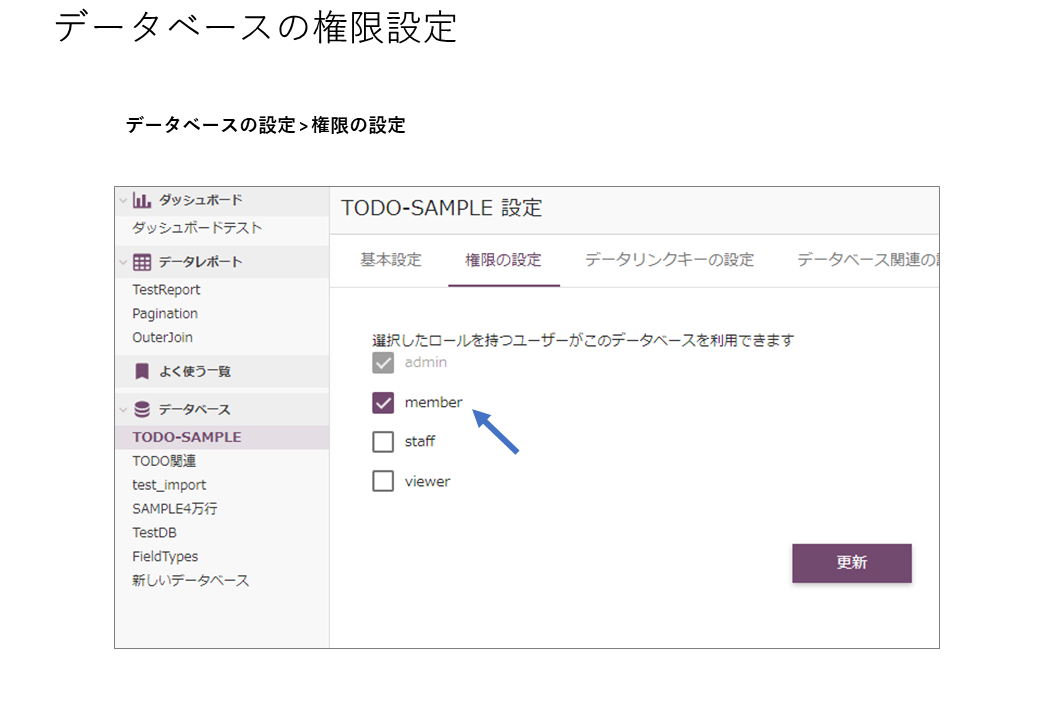
Database permission settings
- Database settings > Permission settings
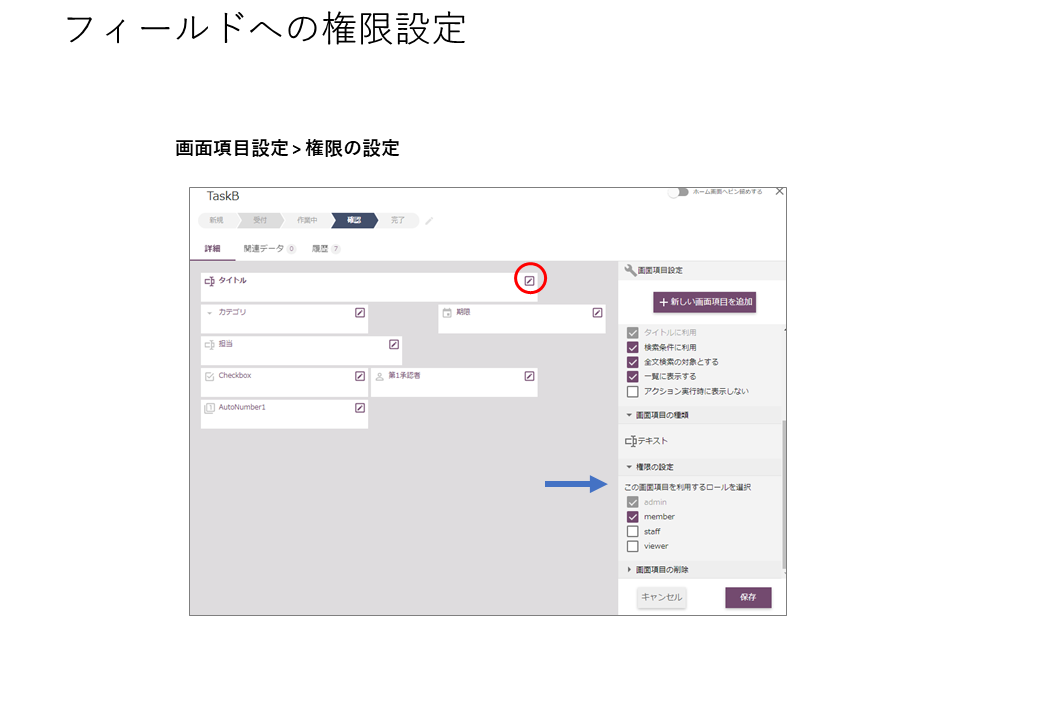
Setting permissions for fields
By specifying a role in the field, you can use it in the following ways:
- Fields visible only to administrators
- Fields that can be viewed or updated by ordering party members but are not visible to subcontractor members
- Fields that internal users can view but customers cannot
- Fields visible only to approvers
How to specify roles
- Display item details page
- Edit or add items
- Add a setting button to the field where you want to specify the role
- Field settings > Privileges settings
※ Access keys can be used to control item viewing.
Setting permissions for actions
By specifying a role for an action, only a specific role can operate the item, as shown below.
Assumed usage scene
- Only people with manager roles can “approve”
- Only system administrator can "delete"
- Only the person in charge of ordering can place an order
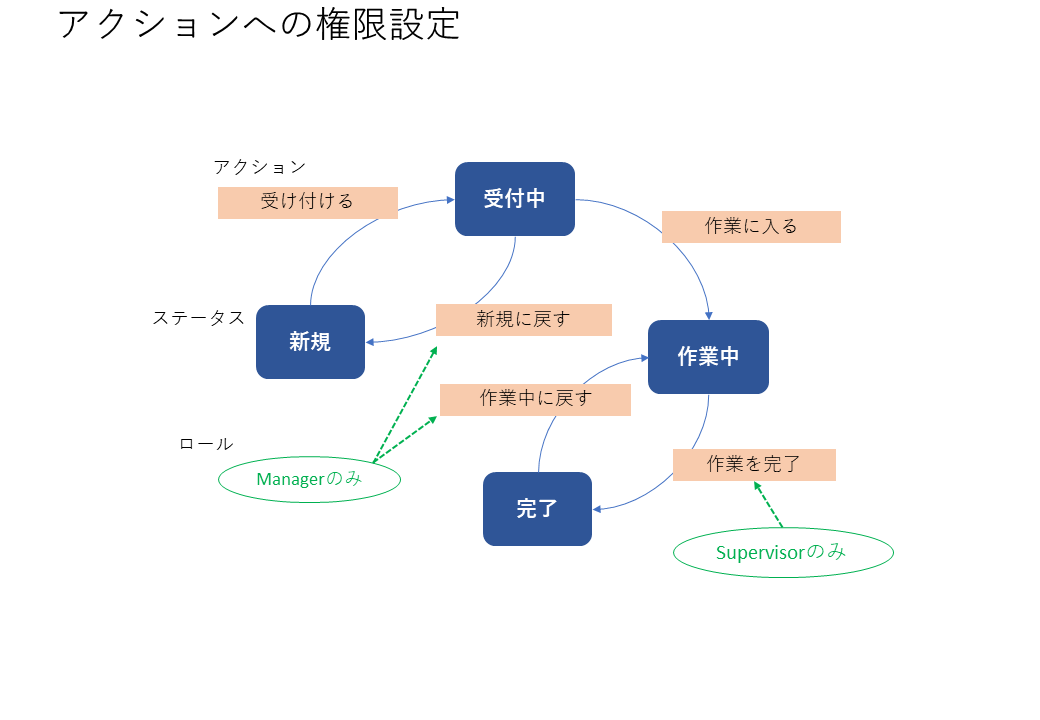
※Tip: To organize the relationship between statuses and actions, it is useful to describe the matrix of permissions in the status chart.
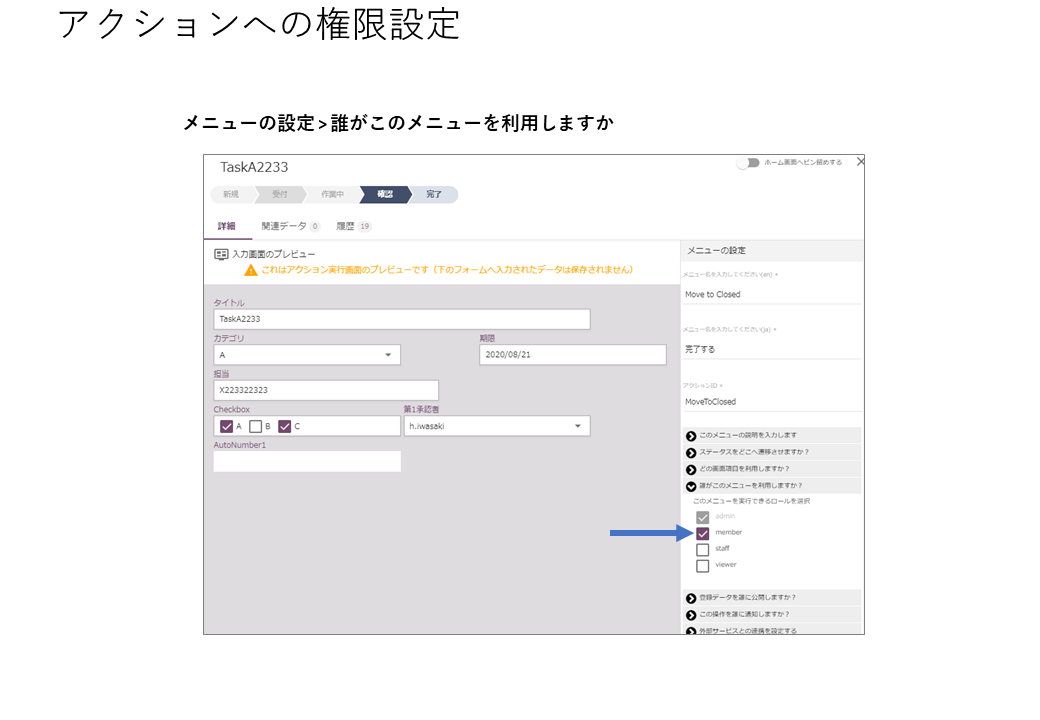
How to specify roles
- Display item details on the page
- Menu settings
- "Who uses this menu?"
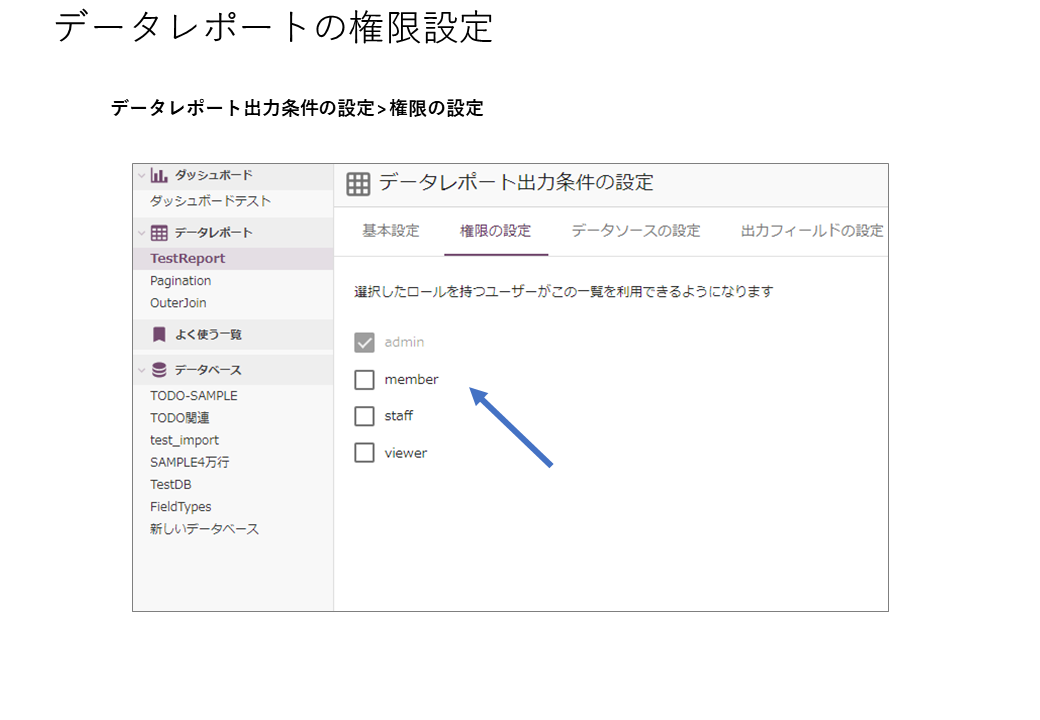
Permission settings for data reports
- Setting data report output conditions > Setting permissions
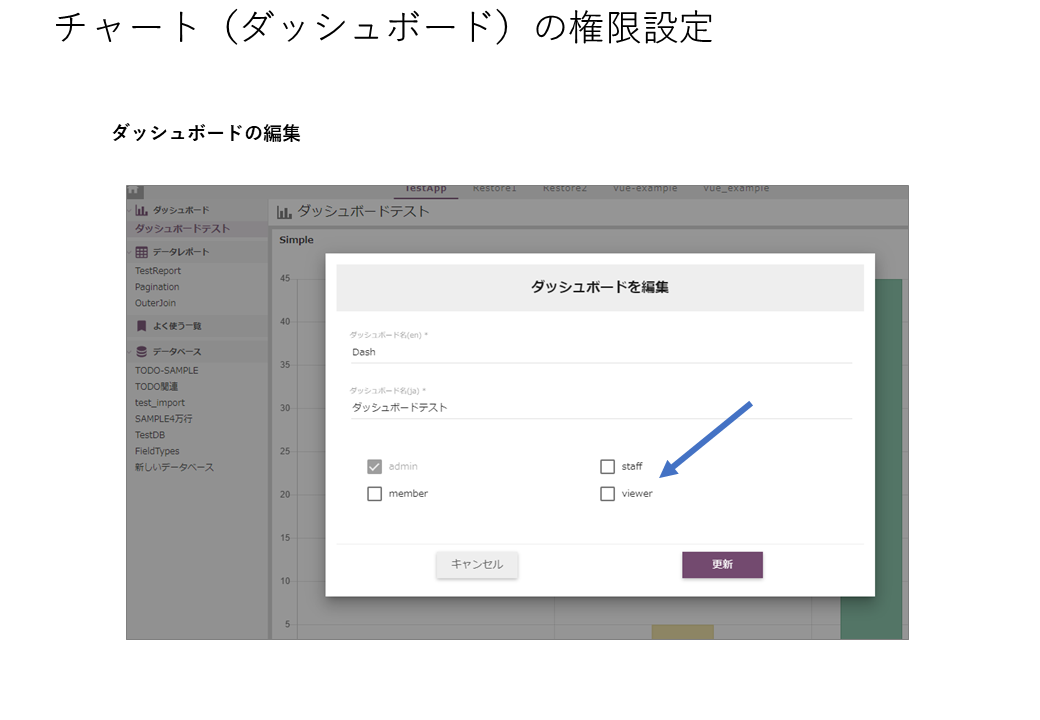
Dashboard permission settings
-Edit dashboard
Controlling roles via API
Roles can be assigned using the API.
For details, please refer to Hexabase API Reference.
Application > Role-related API API
- GetRoleUsers:Get user with role
- AddRoleToUser: Grant role to user
- RemoveRoleFromUser: Remove role from user
- UpdateGroupRoles: Update group roles
- AddGroupRoles: Add group roles
API usage examples
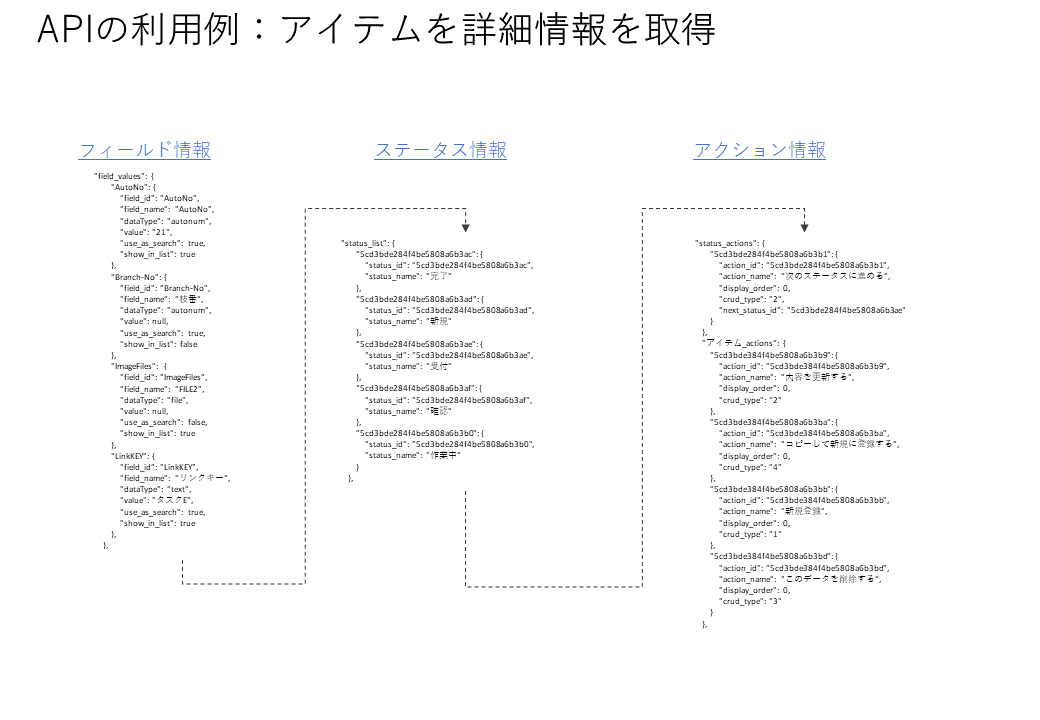
Get item details
Get detailed item information (fields, status, actions, etc.). Return only information that the logged-in user can access
GET https://api.hexabase.io/api/v0/applications/TestApp/datastores/TODO-SAMPLE/アイテムs/details/:アイテム-id
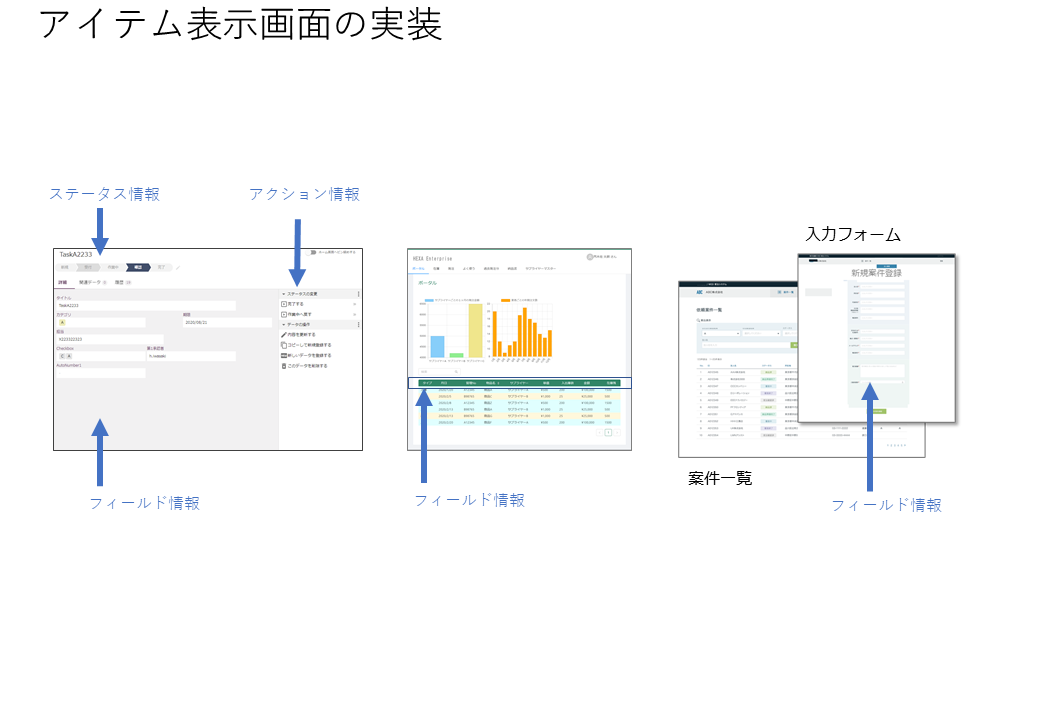
Implementation of an item display page
Based on the information obtained through the API, it is possible to implement it freely in response to system requirements.
For example, the same structure can be implemented with different designs, as shown in the page below.
※Tips: If you design the page after understanding Hexabase's data structure and control system, you will be able to use the API easily, and the development process will proceed smoothly.