External API Interaction (ChatGPT) with ActionScript
This article explains how to link with external web services using Hexabase ActionScript. As a subject, we will take up OpenAI's ChatGPT API.
Call the ChatGPT API from Hexabase only once and write the result to the field.
ChatGPT answers may take several tens of seconds, so you may not get an answer immediately after asking a question. In this demo program, you can display the answer by checking the item after a few tens of seconds.
What to create
It is a program that ChatGPT will answer when you post a question.
It does not have a front end, and you can get answers by operating directly on the admin panel.
Also, each question is independent and does not take into account previous questions and answers.

API to use
OpenAI Chat API
- endpoint: 'https://api.openai.com/v1/chat/completions'
- model: 'gpt-3.5-turbo',
UpdateItem | Hexabase API Guide https://apidoc.hexabase.com/docs/v0/item-actions/UpdateItem
Preparation
ChatGPT API
- Get an OpenAI account
- Get the API Key of OpenAI API
You can check the operation with the following Curl command:
$ curl https://api.openai.com/v1/chat/completions \
  -H "Authorization: Bearer $OPENAI_API_KEY" \
  -H "Content-Type: application/json" \
  -d '{
  "model": "gpt-3.5-turbo",
  "messages": [
    {"role": "user", "content": "観光客向けに、ソメイヨシノについて150文字程度で説明して"}
  ]
}'
Hexabase
Obtain a Hexabase account
Prepare the workspace application database
Prepare the following fields in the database:
- Question(Display ID = "title")
- Answer(Display ID = "answer_ai")
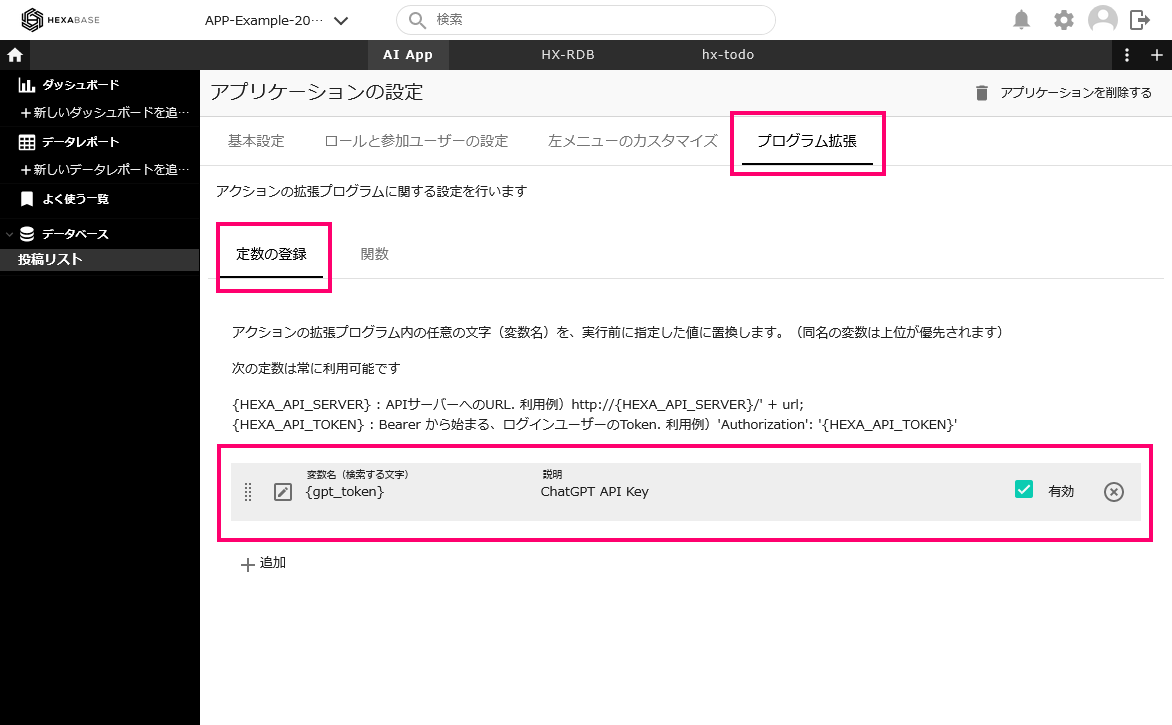
Set the API key for the OpenAI API in Application Settings > Program Extension > Constant Registration
ActionScript
Set the following script in the newly created action, ActionScript - Post.
Source code
async function main(data) {

    logger.info("Main Process starting...");

    const ENDPOINT = 'https://api.openai.com/v1/chat/completions';
    const API_KEY = '{gpt_token}';
    const result_ai = await callChatGPT(data.title, ENDPOINT, API_KEY);

    logger.info("Result AI:" + result_ai);

    const appId = "APP-AI-posts";
    const datastoreId = "Db-Article";
    const comment_fieldId = "answer_ai"; // ID of field to write comment
    return await callHexaAPI(data, appId, datastoreId, comment_fieldId, result_ai);
}

async function callChatGPT(prompt, ENDPOINT, API_KEY) {

    return await axios.post(
            ENDPOINT,
            {
                model: 'gpt-3.5-turbo',
                messages: [{
                    role: "user",
                    content: prompt
                }],
                max_tokens: 200
            },
            {
                headers: {
                    'Content-Type': 'application/json',
                    'Authorization': `Bearer ${API_KEY}`,
                },
            }
        ).then(response => {
            console.log('API呼び出し成功:', response.data.choices[0]);
            return response.data.choices[0].message.content;
        })
        .catch (error => {
            if (error.response) {
                console.log('API呼び出しエラー:', error.response.data);
            } else if (error.request) {
                console.log('APIへのリクエストエラー:', error.request);
            } else {
                console.log('エラー:', error.message);
            }
            throw new Error(error);
    });
}

async function callHexaAPI(data, appId, datastoreId, comment_fieldId, comment_ai) {
    return new Promise((resolve, reject) => {

        logger.info("処理を開始します...");

        // Call the Hexabase API
        const url = "api/v0/applications/" + appId + "/datastores/" + datastoreId + "/items/edit/" + data.i_id;
        const payload = {
            "item": {
                [comment_fieldId]: comment_ai
            },
            "use_display_id": true,
            "return_item_result": true,
            "is_force_update": true,
            "access_key_updates": {
                "ignore_action_settings": true,
                "overwrite": false,
                "apply_related_ds": true,
                "groups_to_publish": []
            }
        } // API request parameters
        return callAPIAsync('POST', url, payload).then(res => {
            logger.log(res.data);
            logger.info("処理が完了しました:" + data.title + ":" + comment_ai);
        }).catch(error => {
            logger.error("エラーが発生しました:" + error)
            reject(error);
        });

    });
}
Explanation
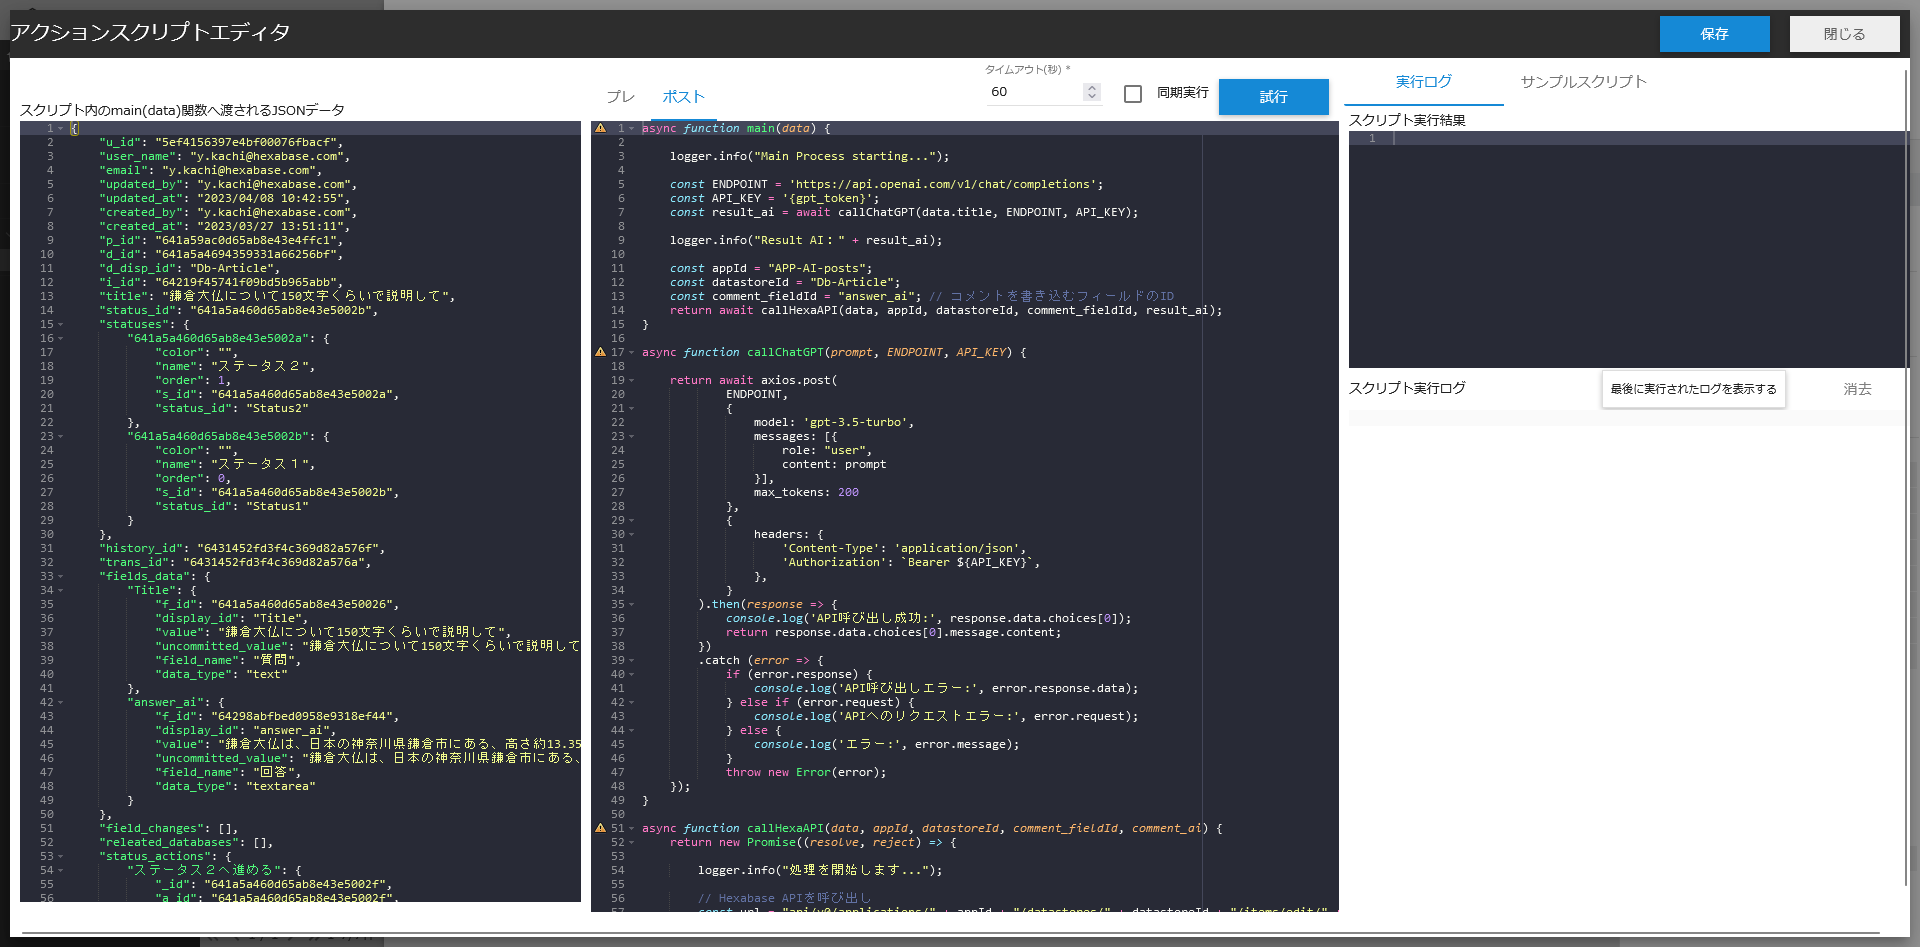
This code calls two functions from the main function.
The first callChatGPT function calls the ChatGPT API and learns the answer from the question.
The second callHexaAPI function calls the Hexabase API and writes the answer to the field.
Action
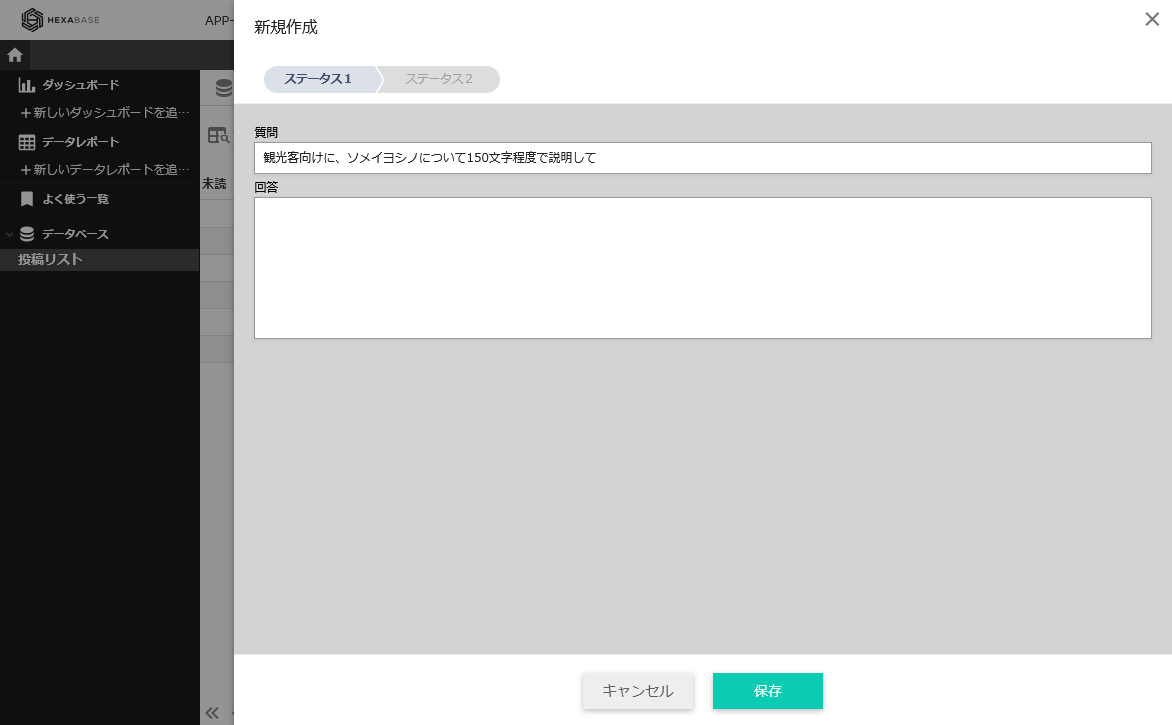
Press the new post button in the application on the admin panel
When prompted to create a new item, enter your question
Once the item is created, close the item details (at this stage, the answer has not been obtained)
After about 10 seconds, click on the created question item, and the answer will be written.
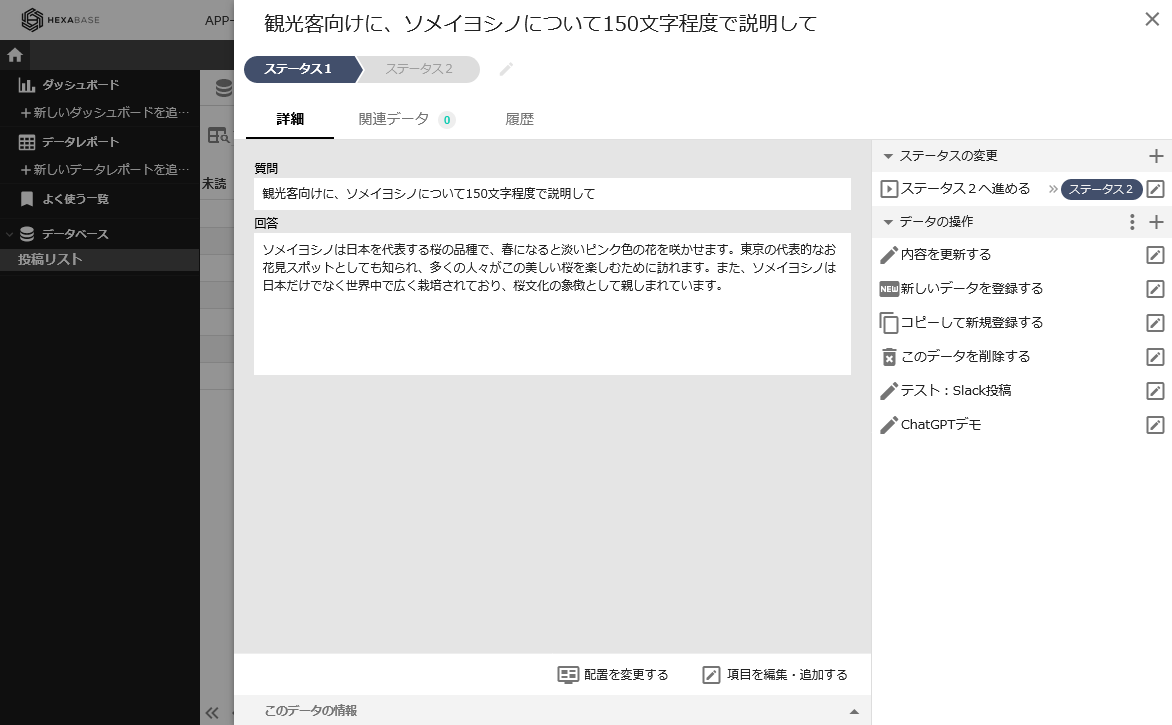
ChatGPT answers may take several tens of seconds, so you may not get an answer immediately after asking a question. Therefore, in this demonstration program, the answer is displayed by checking the item after 10 seconds have passed.
Related information
OpenAI API
https://platform.openai.com/Introducing ChatGPT
https://openai.com/blog/chatgptSimple explanation of how to use ChatGPT API - Qiita
https://qiita.com/mikito/items/b69f38c54b362c20e9e6Let's use ChatGPT API (in PowerShell) - Qiita
https://qiita.com/mkht/items/b4d5fa42af490886d981